NOTE: This is Part 1 in a series on booting Ubuntu from an iSCSI disk. View all of the sections here.
The bulk of the instructions in this post were unabashedly “borrowed” from howtoforge.com.
The first thing we need in our quest to boot Ubuntu from an iSCSI disk is an iSCSI target disk. This is a real or virtual disk on your existing Ubuntu server that will be shared on the network. The Ubuntu Server OS is not actually required. Any desktop version of Ubuntu will work fine. However, I’ll continue to reference this computer as the server since it will be serving the disk to the client machine. Since I’m using XBMCbuntu Eden as my client OS, I chose to create a 20GB virtual disk in the /mnt/media folder on my server as follows:
sudo su
root@server:~$ mkdir /mnt/media/iscsi
root@server:~$ dd if=/dev/zero of=/mnt/media/iscsi/xbmc.img bs=1M count=20000
That last command will write 1 Megabyte worth of zeroes to xbmc.img 20,000 times resulting in a ~20GB image file. Now that we have a virtual disk we need to share it. To install the iSCSI target software type:
root@server:~$ apt-get install iscsitarget
UPDATE: after upgrading to 12.04, iscsitarget failed to start with the message
FATAL: Module iscsi_trgt not found.To fix we also install iscsitarget-dkms:
root@server:~$ apt-get install iscsitarget-dkms
The software is disabled by default, so we need to open the configuration file /etc/default/iscsitarget in your favorite text editor and set ISCSITARGET_ENABLE=true
root@server:~$ nano /etc/default/iscsitarget
Next we define our share. The letters iet stand for iSCSI Enterprise Target.
root@server:~$ nano /etc/iet/ietd.conf
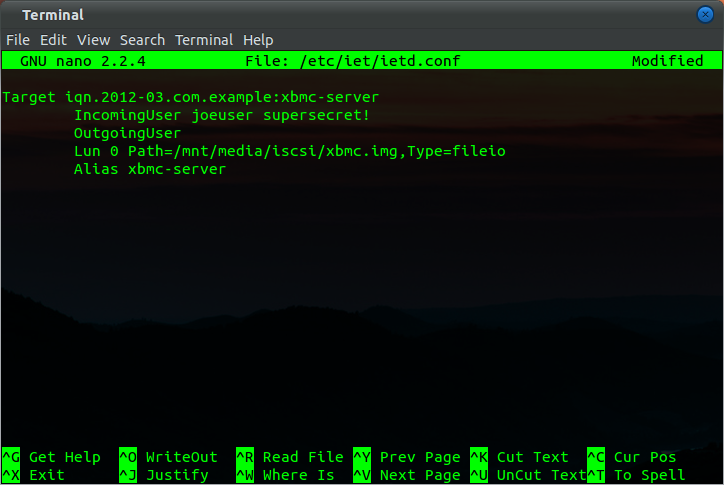
Comment out everything in this file and add this stanza which defines how we will share our virtual disk. The standard naming convention for an iSCSI target is the letters “iqn” followed by the year and month the disk was created, followed by the domain name of the server in reverse order and lastly a unique identifier for this share. Substitute your own authentication values for <username> and <password> or remove them to allow anyone to connect to the disk.
Target iqn.2012-03.com.example:xbmc-server
        IncomingUser <username> <password>
        OutgoingUser
        Lun 0 Path=/mnt/media/iscsi/xbmc.img,Type=fileio
        Alias xbmc-server
Note: RFC 3720 requires <password> to be 12 characters long.
The share definition should be mostly self-explanatory:
- The first line defines the name of the target. This is the name that our initiator will later use to find and connect to the disk.
- The second line defines the user credentials for connecting to the disk. You can omit <username> and <password> if your middle name is Danger.
- OutgoingUser defines the username and password to authenticate the target to the initiators during the discovery process, although we’ve shown that these credentials can also be omitted.
- Line 4 sets up the image file we created above to be the source of our shared disk.
- Lastly we provide an optional alias for the target disk.
By default the disk is shared with the entire network. If you’d like to lock that down, edit the following file
root@server:~$ nano /etc/iet/initiators.allow
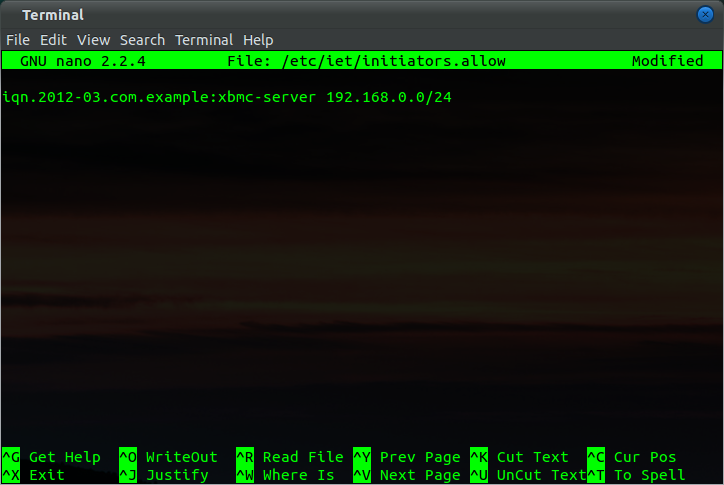
Comment out everything in this file and add this stanza which limits the share to your local network.
iqn.2012-03.com.example:xbmc-server 192.168.0.0/24
Lastly, start the service
root@server:~$ /etc/init.d/iscsitarget start


To deal with “FATAL: Module iscsi_trgt not found.”, you need more than installing it.
You can follow instruction on:
http://www.ezunix.org/index.php?title=Install_iSCSI_Target_on_Debian_or_Ubuntu_Linux
In ubuntu installing the iscsitarget-dkms takes care of compiling and installing the kernel module, but that page looks useful people using debian.
Also, I recently tried to install the dkms package on a custom kernel which failed. I ended up downloading the source from sourceforge.net and building/compiling myself which worked great.
Thanks for this howto!
Miło przeczytać Twój post
I am so thrilled I stumbled upon your site. I really found you by accident, while I was browsing on Bing for something else. Anyways I am here now and would just like to say thank you for a informative post and an all round enjoyable blog. (I also love the theme/design), I don’t have time to read through it all at the moment, but I have added your website to my favorites, so when I have time I will be back to read more. Please do keep up the awesome job!
I cannot get this to work. I tried leaving a detailed message but it was not allowed; I assume because of length. I really want to be able to do this but it is very frustrating.