NOTE: This is Part 2 in a series on booting Ubuntu from an iSCSI disk. In the previous section, we setup an iSCSI target (a.k.a. server) which is sharing a blank iSCSI disk on the network. View all of the sections here.
Once again, the bulk of this post was unabashedly “borrowed” from howtoforge.com
The instructions in this post will work for any existing Ubuntu client, but if you are following along with the series, this is the part where you’ll want to boot your client machine from the Ubuntu CD / USB drive. Once booted, but before we start the installation, we’ll need to connect to the iSCSI disk so that it is available to install to. In order to do this, we’ll need to install the iSCSI initiator software onto the live (read: temporary) system.
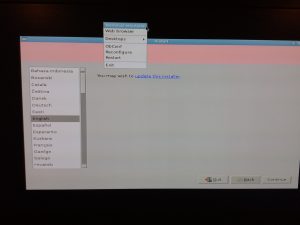
When the installation wizard starts, drop to a shell. In my case, I right-clicked on the background and one of the context menu items was Terminal Emulator – perfect.
Jumping right in: get root, install the iSCSI initiator software and start the daemon
sudo su
root@client:~$ apt-get install open-iscsi
root@client:~$ /etc/init.d/open-iscsi start
Note: To reiterate, we are in a shell on the live system, so even though we just installed the iSCSI initiator software, when we reboot, everything we do here will be nullified. That’s not a bad thing; it’s just important to understand the distinction between the live (temporary) and installed (persistent) systems. We are setting up a connection from the live system so that the installation wizard can install the persistent system to the iSCSI disk.
Using the admin tool, run a discovery command to see what the server has to offer (where 192.168.0.101 is your server’s IP address)
root@client:~$ iscsiadm -m discovery -t st -p 192.168.0.101
You should see a description of the target disk that looks like this:
192.168.0.101:3260,1 iqn.2012-03.com.example:xbmc-server
If you don’t get a response, you may need to adjust your firewall settings on the server to allow access to port 3260 and/or confirm the iSCSI server is setup correctly.
Before we can connect we need to set the authentication settings which are stored in /etc/iscsi/nodes/iqn.2012-03.com.example:xbmc-server/192.168.0.101,3260,1/default. We can edit this file directly, or use the iscsiadm tool instead. These commands can be skipped if you opted not to use authentication when you setup your target.
root@client:~$ iscsiadm -m node --targetname "iqn.2012-03.com.example:xbmc-server" --portal "192.168.0.101:3260" --op=update --name node.session.auth.authmethod --value=CHAP
root@client:~$ iscsiadm -m node --targetname "iqn.2012-03.com.example:xbmc-server" --portal "192.168.0.101:3260" --op=update --name node.session.auth.username --value=<username>
root@client:~$ iscsiadm -m node --targetname "iqn.2012-03.com.example:xbmc-server" --portal "192.168.0.101:3260" --op=update --name node.session.auth.password --value=<password>
Finally, we can connect to the disk using the following command
root@client:~$ iscsiadm -m node --targetname "iqn.2012-03.com.example:xbmc-server" --portal "192.168.0.101:3260" --login
and for future reference, you can disconnect by using this command
root@client:~$ iscsiadm -m node --targetname "iqn.2012-03.com.example:xbmc-server" --portal "192.168.0.101:3260" --logout
You can use fdisk to confirm that the disk is available
root@client:~$ fdisk -l
Now that we have connected to the iSCSI disk, we are ready to continue with the installation, but I’ll leave that for another post.
Part 3: Install & Configure Ubuntu to boot from an iSCSI disk


Simply going through the op’s information numerous will resonate with it as it’s accurate and it’s nice reading from a guy that’s telling stuff on this topic on the internet to see
how to img file mount ?
fdisk -l command and.. no img file.
nothing ..
This tutorial is not designed to have you mount the .img file directly. You mount it through iscsi so it should show up as a regular disk. You mount it by running the iscsiadm commands listed above. In the above example, since I had no other hard drives attached to the system the disk showed up as /dev/sda.
If you are still having trouble, please paste the output of all of your iscsiadm commands here.
Mounting the actual .img file directly on the server is not really what this tutorial was designed for, but you would do so with this command:
sudo mount -o loop my-image-file.img /mnt/disk