Inception
In an effort to never leave the couch, a friend suggested that I build some sort of remote to control the lighting in my man cave. For one of my previous electronics projects I had used my computer to switch a desk lamp on and off. I quickly prototyped a system in my head where I could setup a website on my server that would control the lights, but this seemed a bit clunky to me. My laptop is usually close at hand, but I put it to sleep when I’m not using it. So that means I’d have to wait for it to wake up, login and navigate to the website just to switch on the light. No thank you. If I used my smartphone to access the website I wouldn’t have to wait for it to wake up, but I still have to unlock the phone, and pull up the website. I was looking for something dead simple like the keyless remote on your car, or even a point-and-shoot style TV remote. Yes, I realize this product already exists, but where’s the fun in buying a pre-built system?
If you want something done right…
After looking at a handful of wireless technologies, I settled on using a laser for the remote and a pair of light detectors for each on/off switch. I went this route because it was cheapest, however, that doesn’t mean I had to sacrifice style.
Duck Hunting with Lasers
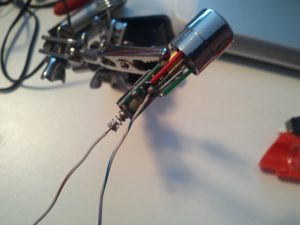
Adding a laser to the Duck Hunt gun couldn’t have been much easier. The first step was to disassemble the laser pointer. I bought a whole pack of them figuring that I’d damage the electronics on the first couple while I was figuring out how to get at the goods. It turns out (at least on the model I bought) you just unscrew the top and the circuit board almost falls out. So I guess that means I’ve got plenty of backup batteries. Since I wasn’t using the laser pointer’s enclosure, I had to solder some wires that would go to the batteries.

The way the aligator clip comes into focus as it extends into the foreground in this picture reminds me of GLaDOS
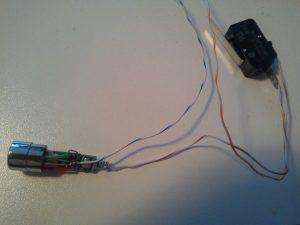
In the next picture, on the side of the circuit board, you can see where I added a jumper which essentially holds down the laser’s built-in button. The switch on the upper right is pulled from the Duck Hunt controller. Nothing complicated here: when you pull the trigger, it closes this switch, allowing power from the batteries to flow to the laser.
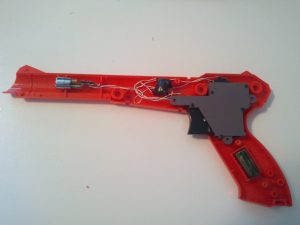
The Duck Hunt controller contained some electronics in the barrel of the gun which I promptly removed and replaced with the laser. The black blob of electrical tape in the middle is the 3 coin-cell batteries. They won’t be easy to replace, so here’s to hoping they last a while. If they end up living a short life, I’ll look into replacing them with some rechargeable batteries, and adding a jack somewhere on the gun where I can plug it in.
The gun looks and works fantastically. Now it’s time to get to work on the receivers which will be the brains of this operation as they detect the laser pointer and switch the lights accordingly.


Your method of telling the whole thing in this article is in fact nice, all be capable of effortlessly know it, Thanks a lot.