NOTE: This is Part 5 in a series on booting Ubuntu from an iSCSI disk. View all of the sections here.
Previously we setup a iSCSI target (server) and installed Ubuntu to the iSCSI disk. We also setup iPXE on the server, but we need to configure dnsmasq to route the client correctly.
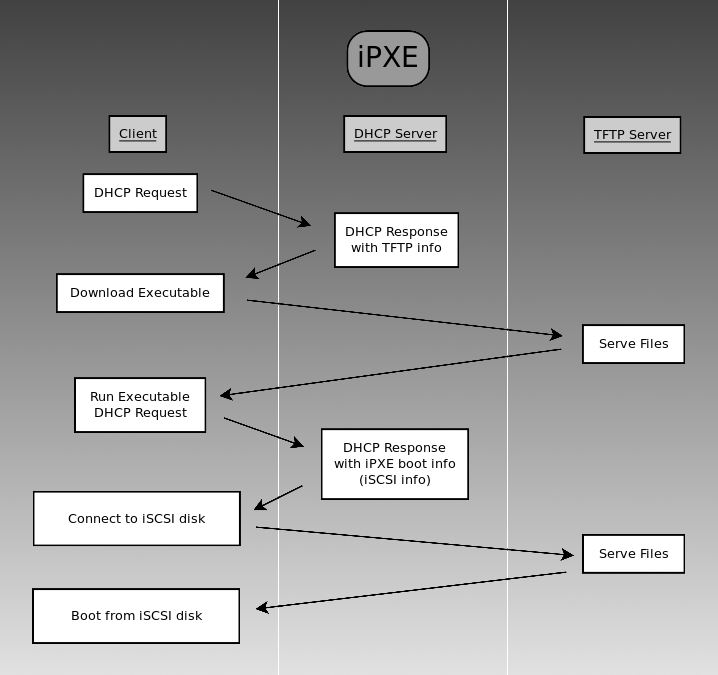
In my previous post I walked through how the iPXE process flows. Here’s a quick overview to refresh your memory:
We already have the server configured so now let’s work through the roles of the DHCP server.
- The DHCP server needs to respond to DHCP requests with the TFTP server information. Any clients not concerned with iSCSI booting will ignore the extra information while our iSCSI initiator will use it to download and run the iPXE executable.
- The iPXE executable, when run, makes an additional, special DHCP request that includes a flag indicating that the request was made from an iPXE executable. When the DHCP server receives this type of request, it needs to respond with the iSCSI connection information, rather than the TFTP info.
Much of what follows is already documented at http://ipxe.org/howto/chainloading, but to be throrough, the two most popular DHCP servers are dhcpd and dnsmasq
ISC DHCPD
Note: I don’t have a server running dhcpd at this time so this section is entirely hearsay until I learn otherwise.
We need to edit /etc/dhcpd.conf to contain
next-server 192.168.0.101;
filename "undionly.kpxe";
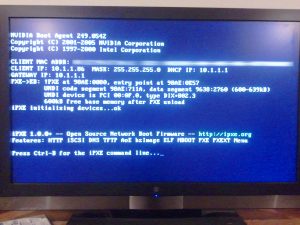
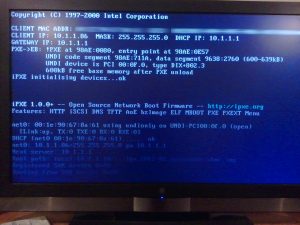
Where 192.168.0.101 is the IP of the TFTP server you setup in Part 4. That takes care of roll #1 of the DHCP server. You should now be able to test your progress by booting your client machine. You should see iPXE start, request an IP address, which will cause it to re-run iPXE in an infinite loop. That’s a good thing… for now.
To break out of the cycle, also add the following to your /etc/dhcpd.conf file
if exists user-class and option user-class = "iPXE" {
    filename "";
    option root-path "iscsi:192.168.0.101::::iqn.2012-03.com.example:xbmc-server";
} else {
    filename "undionly.kpxe";
}
Where 192.168.0.101 is your iSCSI target. Again, find lots of useful information here.
That takes care of the DHCP server’s second role. If everything is configured properly, you’re done! Grab a cold one and watch as your system follows the boot process outlined above to load GRUB, which in turn boots Ubuntu!
DNSMASQ
To configure DNSMASQ, we’ll need to edit /etc/dnsmasq.conf
Side note: If you’re using untangle as your DHCP server, you can click Config > Networking > Advanced > DHCP & DNS. Any text entered in the text box here will be magically added to dnsmasq.conf and the dnsmasq service will be restarted for you when you click the Apply button.
First we need to respond to standard DHCP requests with the TFTP information
enable-tftp
tftp-root=/mnt/media/tftpboot

dhcp-boot=tag:!IPXEBOOT,undionly.kpxe,TFTP_Server_Name,192.168.0.101
The first two lines should be pretty self explanitory while the last line requires some explanation. We are specifying a conditional boot option. The first section declares the condition. If the request was NOT tagged with IPXEBOOT, then specify the client the filename (undionly.kpxe), TFTP server name and IP address where that file can be found. If the TFTP server and DHCP server are the same box, you can omit the last two parameters like so
dhcp-boot=tag:!IPXEBOOT,undionly.kpxe
Important Note: If your clients hang at this point, you may, (like me) have an older version of dnsmasq. Older version of dnsmasq used “net:” to instead of “tag:” and they used # instead of ! to negate the result. So my configuration looks like this:
enable-tftp
tftp-root=/mnt/media/tftpboot

dhcp-boot=net:#IPXEBOOT,undionly.kpxe,TFTP_Server_Name,192.168.0.101
#In the previous line, the # symbol is not a comment, it is a negation operator.
#Meaning that the options specified here will only apply to requests NOT
#tagged with IPXEBOOT
dhcp-match=IPXEBOOT,175
dhcp-option=175,8:1:1
dhcp-option=tag:IPXEBOOT,17,"iscsi:192.168.0.101::::iqn.2012-03.com.example:xbmc-server"
- Line 1 checks if dhcp-option 175 (iPXE/gPXE related option) was specified by the client, and if so, it tags the request with IPXEBOOT.
- Line 2 sets option number 175 to 8:1:1 which effectively enables the KEEP_SAN_ALIVE parameter which is required for iSCSI booting.
- Line 3 once again sets a conditional boot option. If the request has been tagged with the “IPXEBOOT” tag, then specify the iSCSI disk as the path name to the client’s root disk (i.e. option 17).
Once more, since my dnsmasq does not support the “tag:” syntax, my dnsmasq.conf contains the following:
dhcp-match=IPXEBOOT,175
dhcp-option=175,8:1:1
dhcp-option=net:IPXEBOOT,17,"iscsi:192.168.0.101::::iqn.2012-03.com.example:xbmc-server"
That takes care of the DHCP server’s second role. If everything is correct, you’re done! Grab a cold one and watch as your system follows the boot process outlined above to load GRUB, which in turn boots Ubuntu!
For more information on the dhcp-options available to dnsmasq, see http://www.ietf.org/rfc/rfc2132.txt


It was a little tricky to adapt to the latest version of Ubuntu. I needed to update the latest packages using “apt-get update” then make chroot work properly using first:
mount -t proc proc /mnt/newsystem/proc
mount -t sysfs sys /mnt/newsystem/sys
mount -o bind /dev /mnt/newsystem/dev
but otherwise it worked as indicated! Sir, you are a magician. I’m now booting 10.12 from an iscsi target.
Maybe there could be a way of booting a Ubuntu live CD using iPXE but haven’t figured it out yet.
Thanks! I’ve added your comments to the original post.
If you just want to boot from an .iso stored on a network drive, you can do that with plain PXE and TFTP. You don’t need all of the extra software described here. Although, if you have already got iPXE and iSCSI setup, I would imagine you could simply replace the .img file we created in part one with an .iso file. That would be a fun experiment.
Please note the dhcpd directions seem to be erroneous. dhcpd.conf should read:
if exists user-class and option user-class = “iPXE” {
filename “”;
option root-path “iscsi:192.168.0.101::::iqn.2012-03.com.example:xbmc-server”;
} else {
filename “undionly.kpxe”;
}
Thanks, updated.
So everything works up til the very end. I boot the client. It connects, grabs PXE, which grabs iPXE. Grub displays some available kernels, and when I choose Ubuntu from the list, I get:
Error:
Gave up waiting for root device. Common problems:
-Boot args (cat /proc/cmdline)
-Check rootdelay= (did the system wait long enough?)
-Check root= (did the system wait for the right device?)
-Missing modules (cat /proc/modules; ls/dev)
ALERT! /dev/disk/by-uuid/ does not exist. Dropping to a shell!
If I check /proc/cmdline:
BOOT_IMAGE=/boot/vmlinuz-3.2.0-35-generic-pae root=UUID= ro quiet splash ISCSI_INITIATOR=iqn.2012-12.com.example:ubuntu-client1 ISCSI_TARGET_NAME=iqn.2012-03.com.example:ubuntu-server ISCSI_TARGET_IP=x.x.x.x ISCSI_TARGET_PORT=3260 ISCSI_USERNAME= ISCSI_PASSWORD=
And under /proc/modules:
usbhid 41937 0 – Live 0xf849a000
hid… (remainder truncated)
e1000e… (remainder truncated)
Ubuntu 12.04. I upgraded to GRUB 2, but that is not the problem since the old GRUB had this exact same problem, which is why I tried the upgrade.
Any ideas?
If GRUB is loading, then that means you’ve got the iSCSI part configured correctly–assuming your followed this tutorial–because we installed GRUB to the iSCSI disk. So that’s good!
The first thing I see is that the boot command says your root directory is UUID= There should be the ID of a device there. We need to figure out what the correct ID is. Start up the system until it drops you to a shell. Then, assuming you installed your system to /dev/sda1 type:
sudo blkid /dev/sda1
Substitude sda1 for the partition that you installed linux to. It should give you output like this:
/dev/sda1: UUID=”68e556a7-09b8-4aa9-96a1-87fa3eb559cb” TYPE=”ext4″
Write down that UUID. Reboot to grub and press “e” to edit the command line so that it looks like this:
BOOT_IMAGE=/boot/vmlinuz-3.2.0-35-generic-pae root=UUID=68e556a7-09b8-4aa9-96a1-87fa3eb559cb ro quiet…
Obviously, put your UUID in there, not mine. After that press F10 (I think it’s F10, maybe it’s a different key) to boot the modified file.
Note: Whether it works or not, the change will not be saved. So once you boot into the system, you’ll need to run sudo update-grub
Oh no! I’m really sorry, the UUID was there. I removed it because I knew what it specifically was didn’t matter so I didn’t type it all out. I meant to put a root=UUID= or something. I’m sorry about that :-/ Have you any other guesses about where things are failing?
No problem. The message indicates that the kernel is loaded, but can’t find the root device (aka hard drive partition) where your system is installed. So to reiterate, that means that grub was able to connect to the iSCSI partition and load the kernel image, but the kernel couldn’t connect to/find the partition.
First, if you’re not using ISCSI_USERNAME and ISCSI_PASSWORD I would omit them.
Second, when you drop to the shell, I would check /proc/modules for the open iscsi client
cat /proc/modules | grep iscsi
If it’s not there, you’ll need to go back and add that module to the kernel. Follow Part 3 in the tutorial after the section where it says DO NOT REBOOT.
I figured something out! Even though I keep putting placeholders for my passwords and usernames and UUIDs, this website is stripping them because it thinks they are HTML tags.
I figured out the problem too, after a lot of investigating prompted by what you said. I noticed some references online to a /sbin/iscsistart file, which I didn’t have. Turns out that when you download open-iscsi from their website and then run make and make install, iscsistart is created, but not automatically copied to /sbin. So, I just installed the open-iscsi package via apt-get, and now things seem to be progressing better.
Thanks so so much for your help!
sorry to disturb you.when i boot my client machine,and connect to server through pxe,all work well,but when ipxe try to connect to iscsi, it returns a prompt”could not open san device, operation not permitted”
can you give some addvice?
thanks
I would try booting to a live CD/USB on your client computer. Then go through the steps outlined in my second post (http://www.heath-bar.com/blog/?p=243). Are you able to connect to the disk using this method? Whether you can or not, this will help you determine if you have a problem with the way iPXE is configured, or if the problem is how the iSCSI server is configured.
Some other things to consider:
How do you manage the situation where you have one dnsmasq instance serving multiple PCs that are doing iSCSI boots each to their own separate iSCSI target endpoint on the iSCSI target host? In other words, how would you map iSCSI targets to individual hosts who want to boot their own (separate) iSCSI endpoints?
It seems like you would need to specify a compound conditional, using the MAC address, something like (making up some new syntax):
dhcp-option=tag:IPXEBOOT&MACID==AA:AA:AA:AA:AA:AA,17,”iscsi:192.168.0.101::::iqn.2012-03.com.example:xbmc-server”
dhcp-option=tag:IPXEBOOT&MACID==BB:BB:BB:BB:BB:BB,17,”iscsi:192.168.0.101::::iqn.2012-03.com.example:another-server”
But perhaps I am missing something entirely – any ideas? Thanks.
Answered my own question. Replaced the third line (…tag:IPXEBOOT…) with (for example):
dhcp-host=AA:AA:AA:AA:AA:AA,set:CLIENTONE
dhcp-option=tag:CLIENTONE,17,”iscsi:100.10.10.51::::iqn.2012-03.com.example:target-one”
dhcp-host=BB:BB:BB:BB:BB:BB,set:CLIENTTWO
dhcp-option=tag:CLIENTTWO,17,”iscsi:100.10.10.51::::iqn.2012-03.com.example:target-two”
I’ll also mention that I am using Ubuntu Server 12.04, and for the most part only had to run the steps in the first guide (setting up iSCSI Targets) and last guide (setting up dnsmasq & iPXE).
The intermediary steps to perform the OS install were possible from the iSCSI support already built-in to the ubuntu server CD (so I didn’t need to do apt-get install on anything, it is all supported out of the box by the Ubuntu Server CD).
You can do this by booting the Ubuntu Server CD, going through the install steps like normal, until you get to the partitioning menu. Choose ‘Manual’, then you can configure an iSCSI target directly through the Ubuntu installer without having to shell out anything. Then simply reboot and do your PXE boot and you’re done. (Also if your end goal is to use Ubuntu Desktop, you can simply install the desktop packages at this point and you will have a functioning desktop just as you would had you installed ubuntu desktop to begin with).
Thanks for the info, Craig.
Heathbar,
You’re weblinks appear to be broken now.
Cheers
Fixed.