I’ve never had a shortage of RROD Xbox 360s so when I needed to raise my monitor up a few inches, I had the perfect thing.

Xbox 360 Monitor Stand
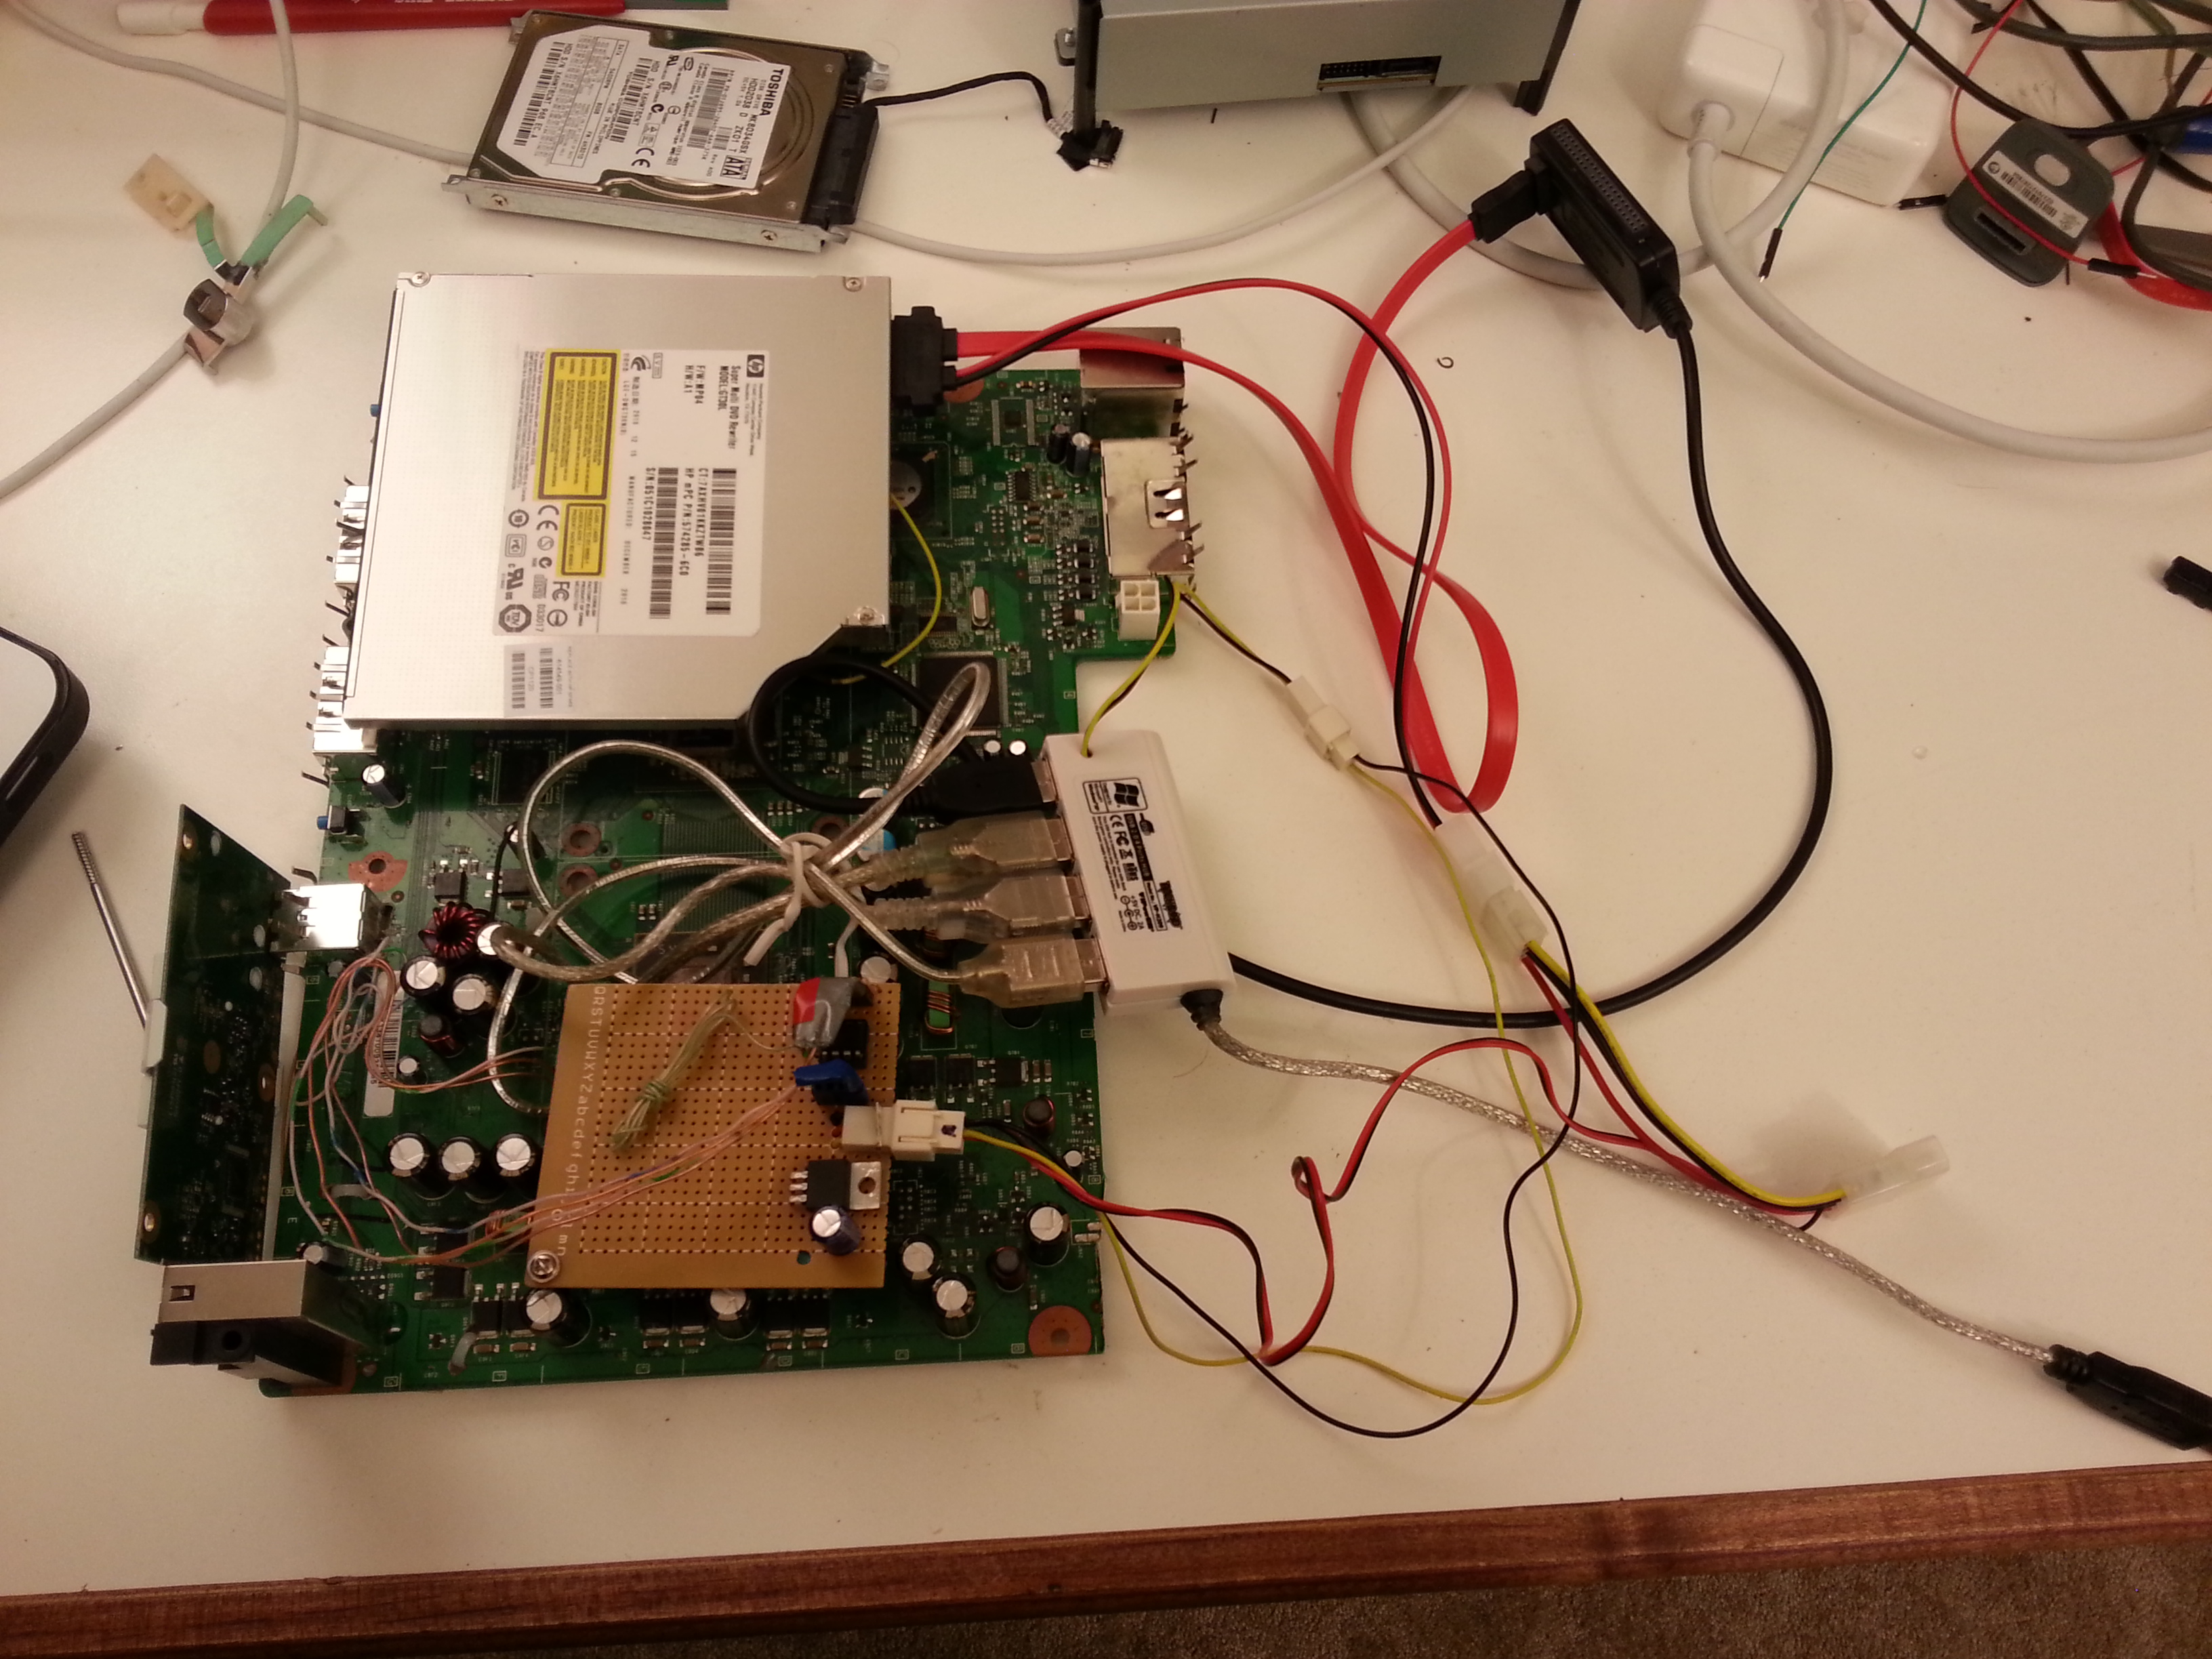
Since my desk shares a wall with the utility room, I decided to move the tower in there and ran some extra long USB/Video/Speaker/etc. cables through the wall. This makes for a much cleaner and quieter work space. The only drawback is using the CD drive requires a trip around the corner. With the Xbox 360 now gracing my desktop, it didn’t take long to realize it held both a DVD drive and a pair of USB ports on the front.
First I attacked the USB ports. Literally: I cut the traces from the rest of the motherboard and soldered on my own USB male plugs.

Connecting the USB ports
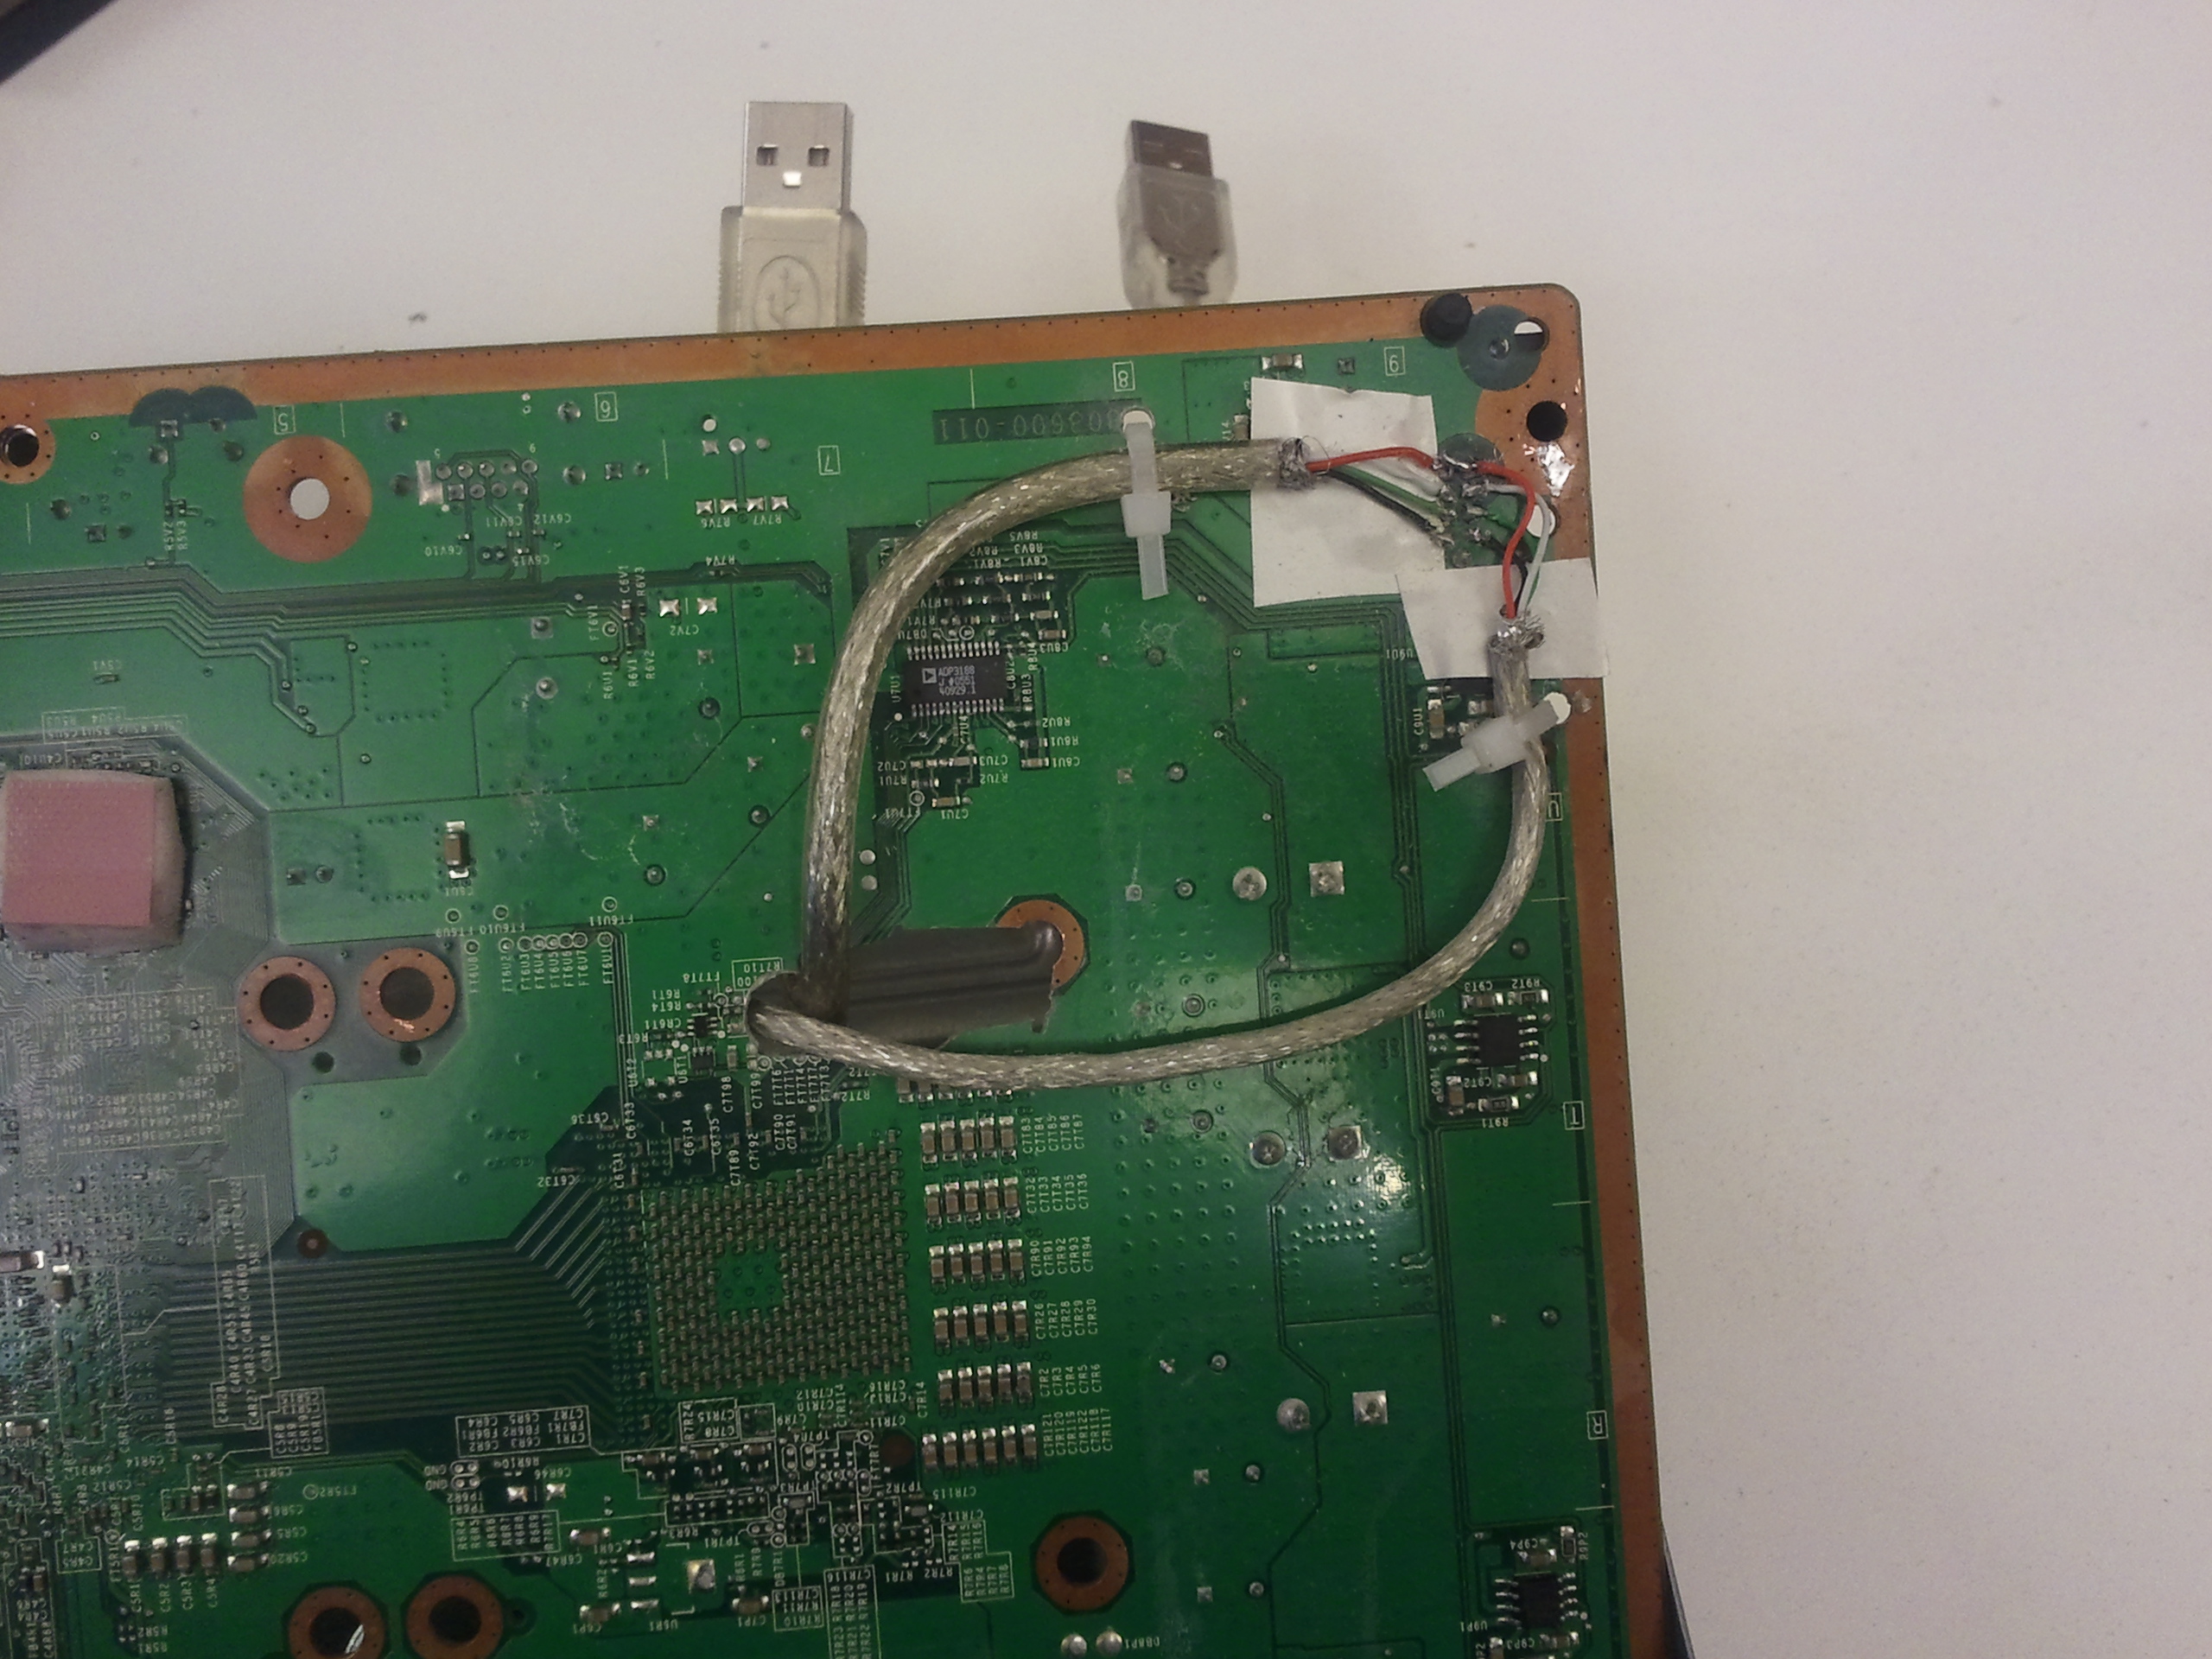
Connecting the USB ports
It was my intention to use a standard USB to SATA adapter to connect the DVD drive to a USB hub with the two USB ports on the front. However, the Xbox’s DVD drive is a tricky beast. It requires 3.3V, 5V and 12V. It also has a pin that opens the tray when set high and closes otherwise, but the eject button on the console is a momentary switch. I needed a simple circuit to toggle voltage/GND to that pin when the momentary switch was pressed. While researching that circuit I came across a blog showing that you could connect the 360’s RF board to a PC via USB and with a little arduino magic you could even get the lights blinking. I opted for an ATTiny85 so that I could control both the DVD drive eject button and the RF module.
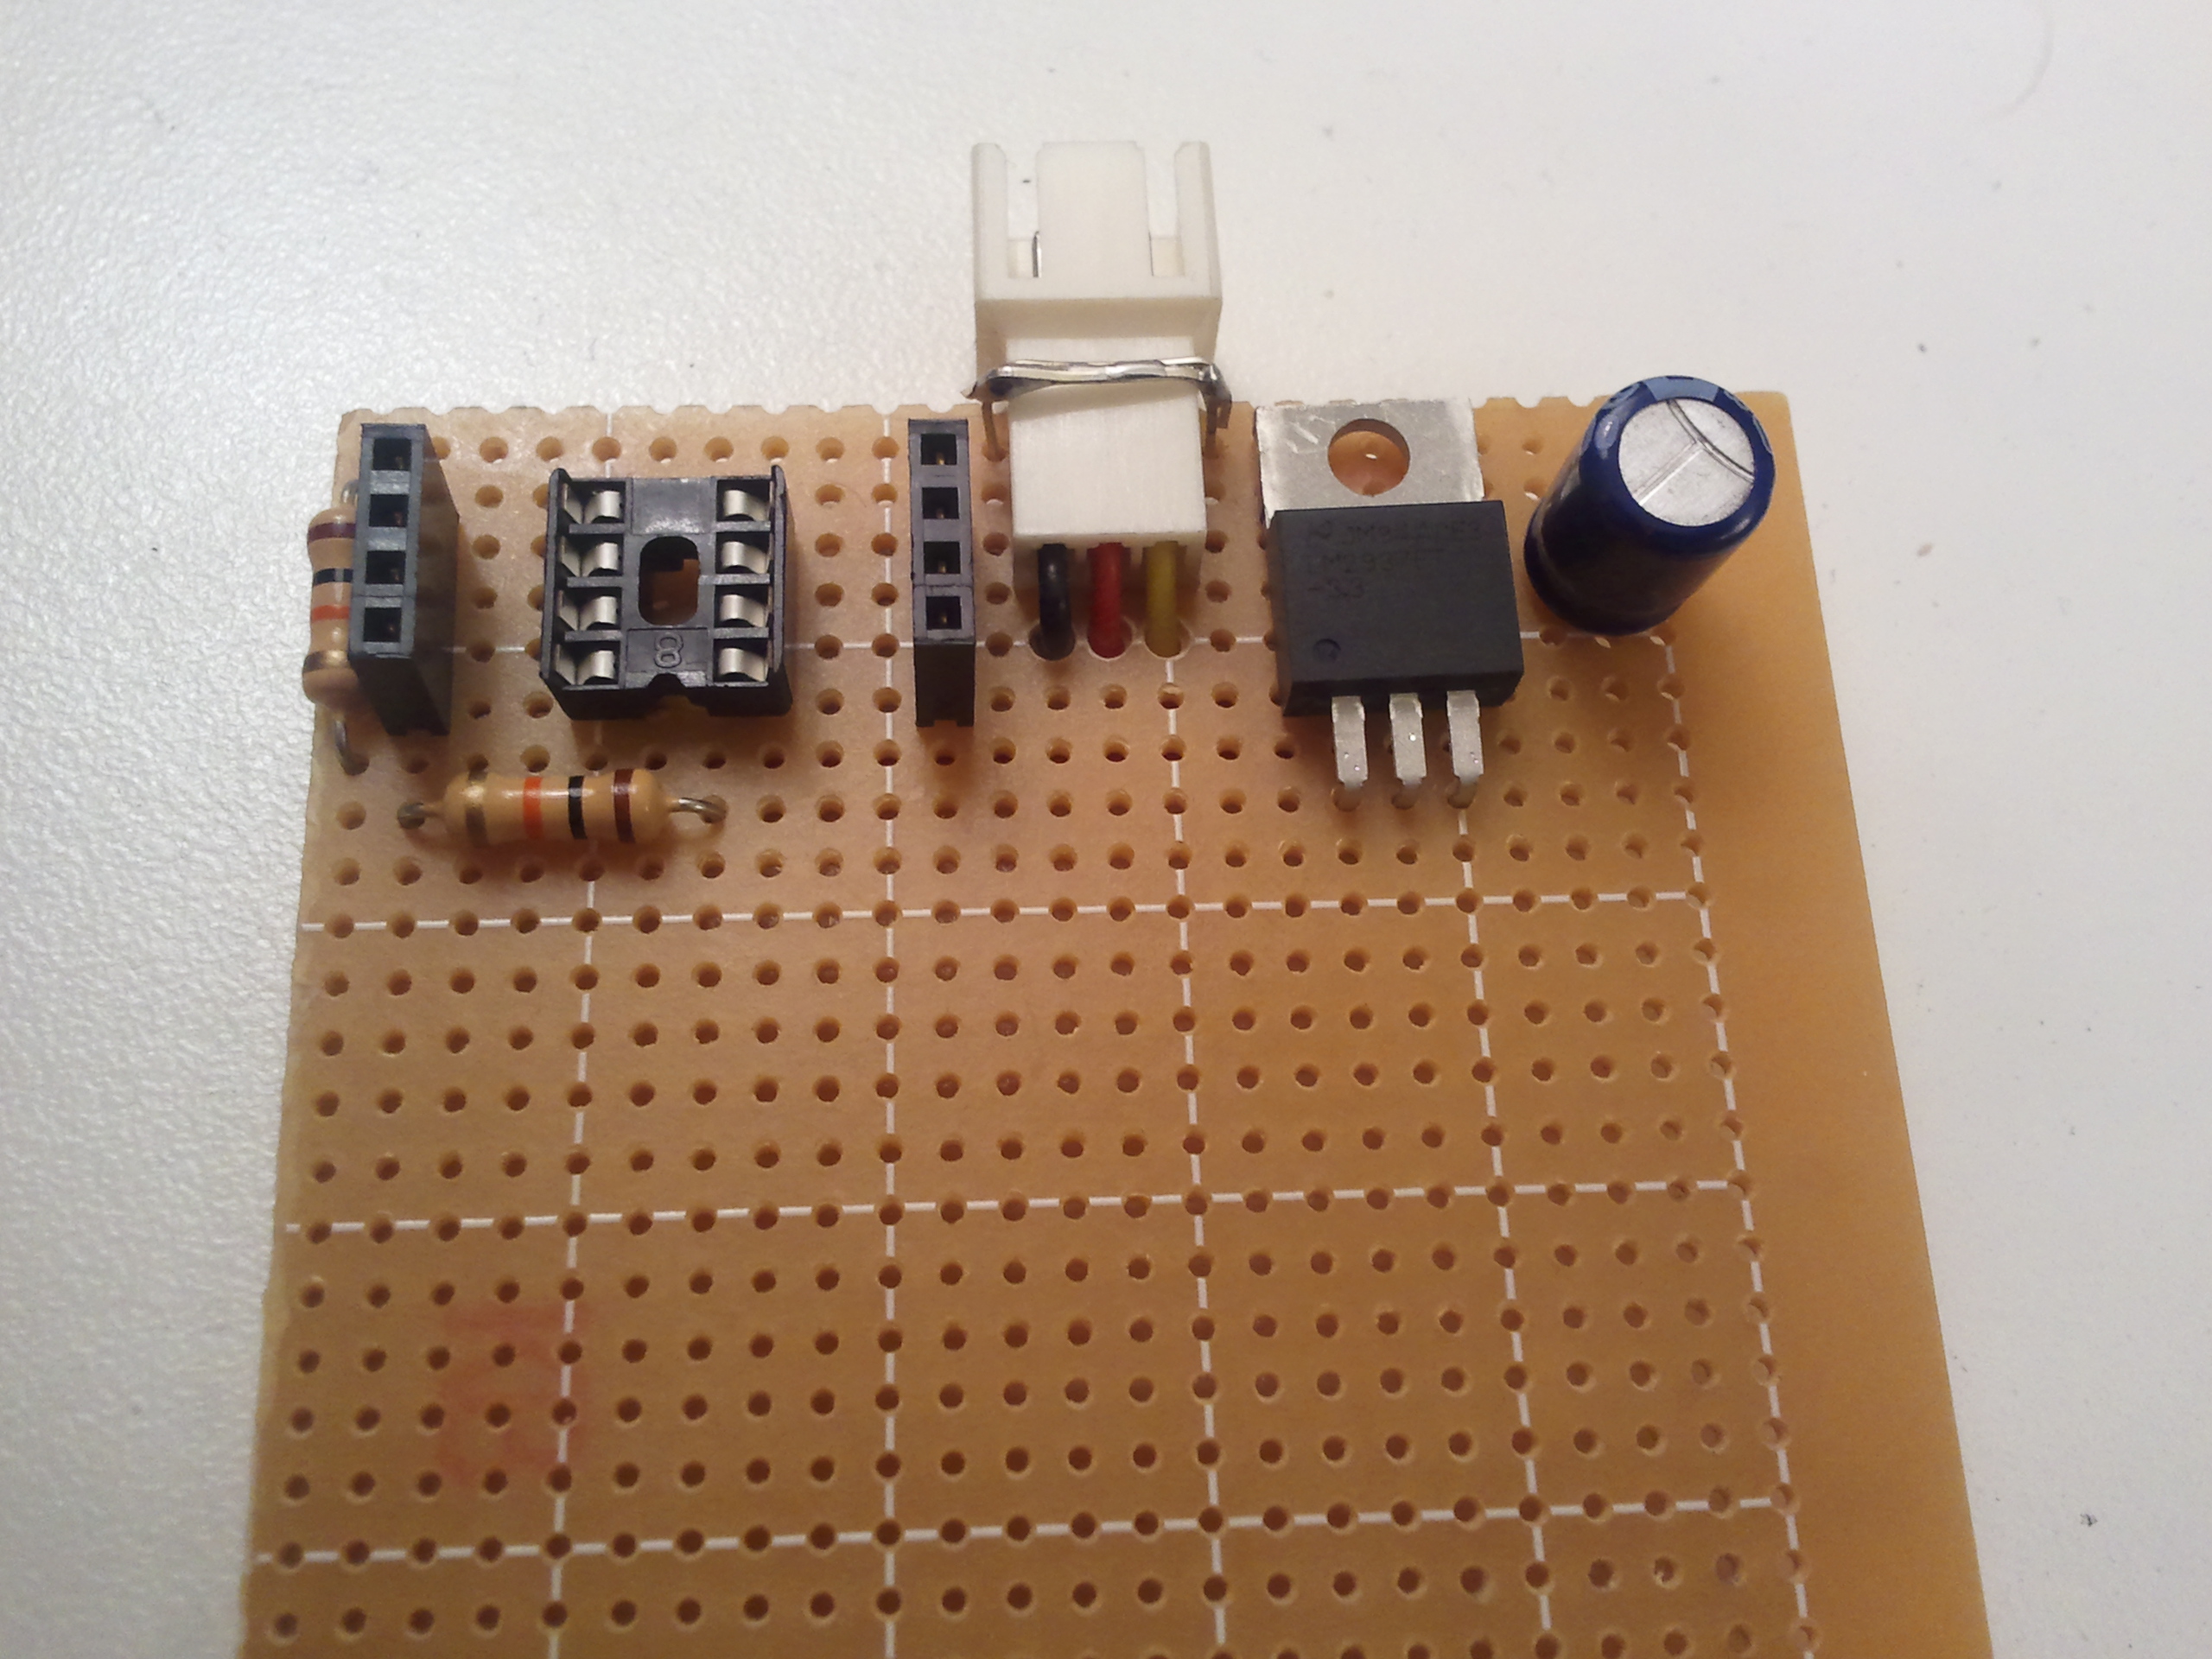
Custom Controller Board

Work in Progress
After getting the hardware working seamlessly, if not tidily, I plugged the DVD drive into the computer only to find that the PC didn’t recognize the drive. After some research and tinkering with different DVD drives from each of the various manufacturers, I couldn’t get a single drive to read a disk like a standard DVD drive.
In the end, it was for the best. I snagged a slim DVD burner from an old laptop. This drive was designed to eject using a momentary switch so wiring it up was much easier.

Wiring the Eject Button
The RF board was modified much in the same way as the USB Jacks. I started by cutting the traces, but apparently some were routed internally, so I cut a hole through the board for good measure. Like the USB jacks, I soldered a male USB cable to the jack on the mother board.
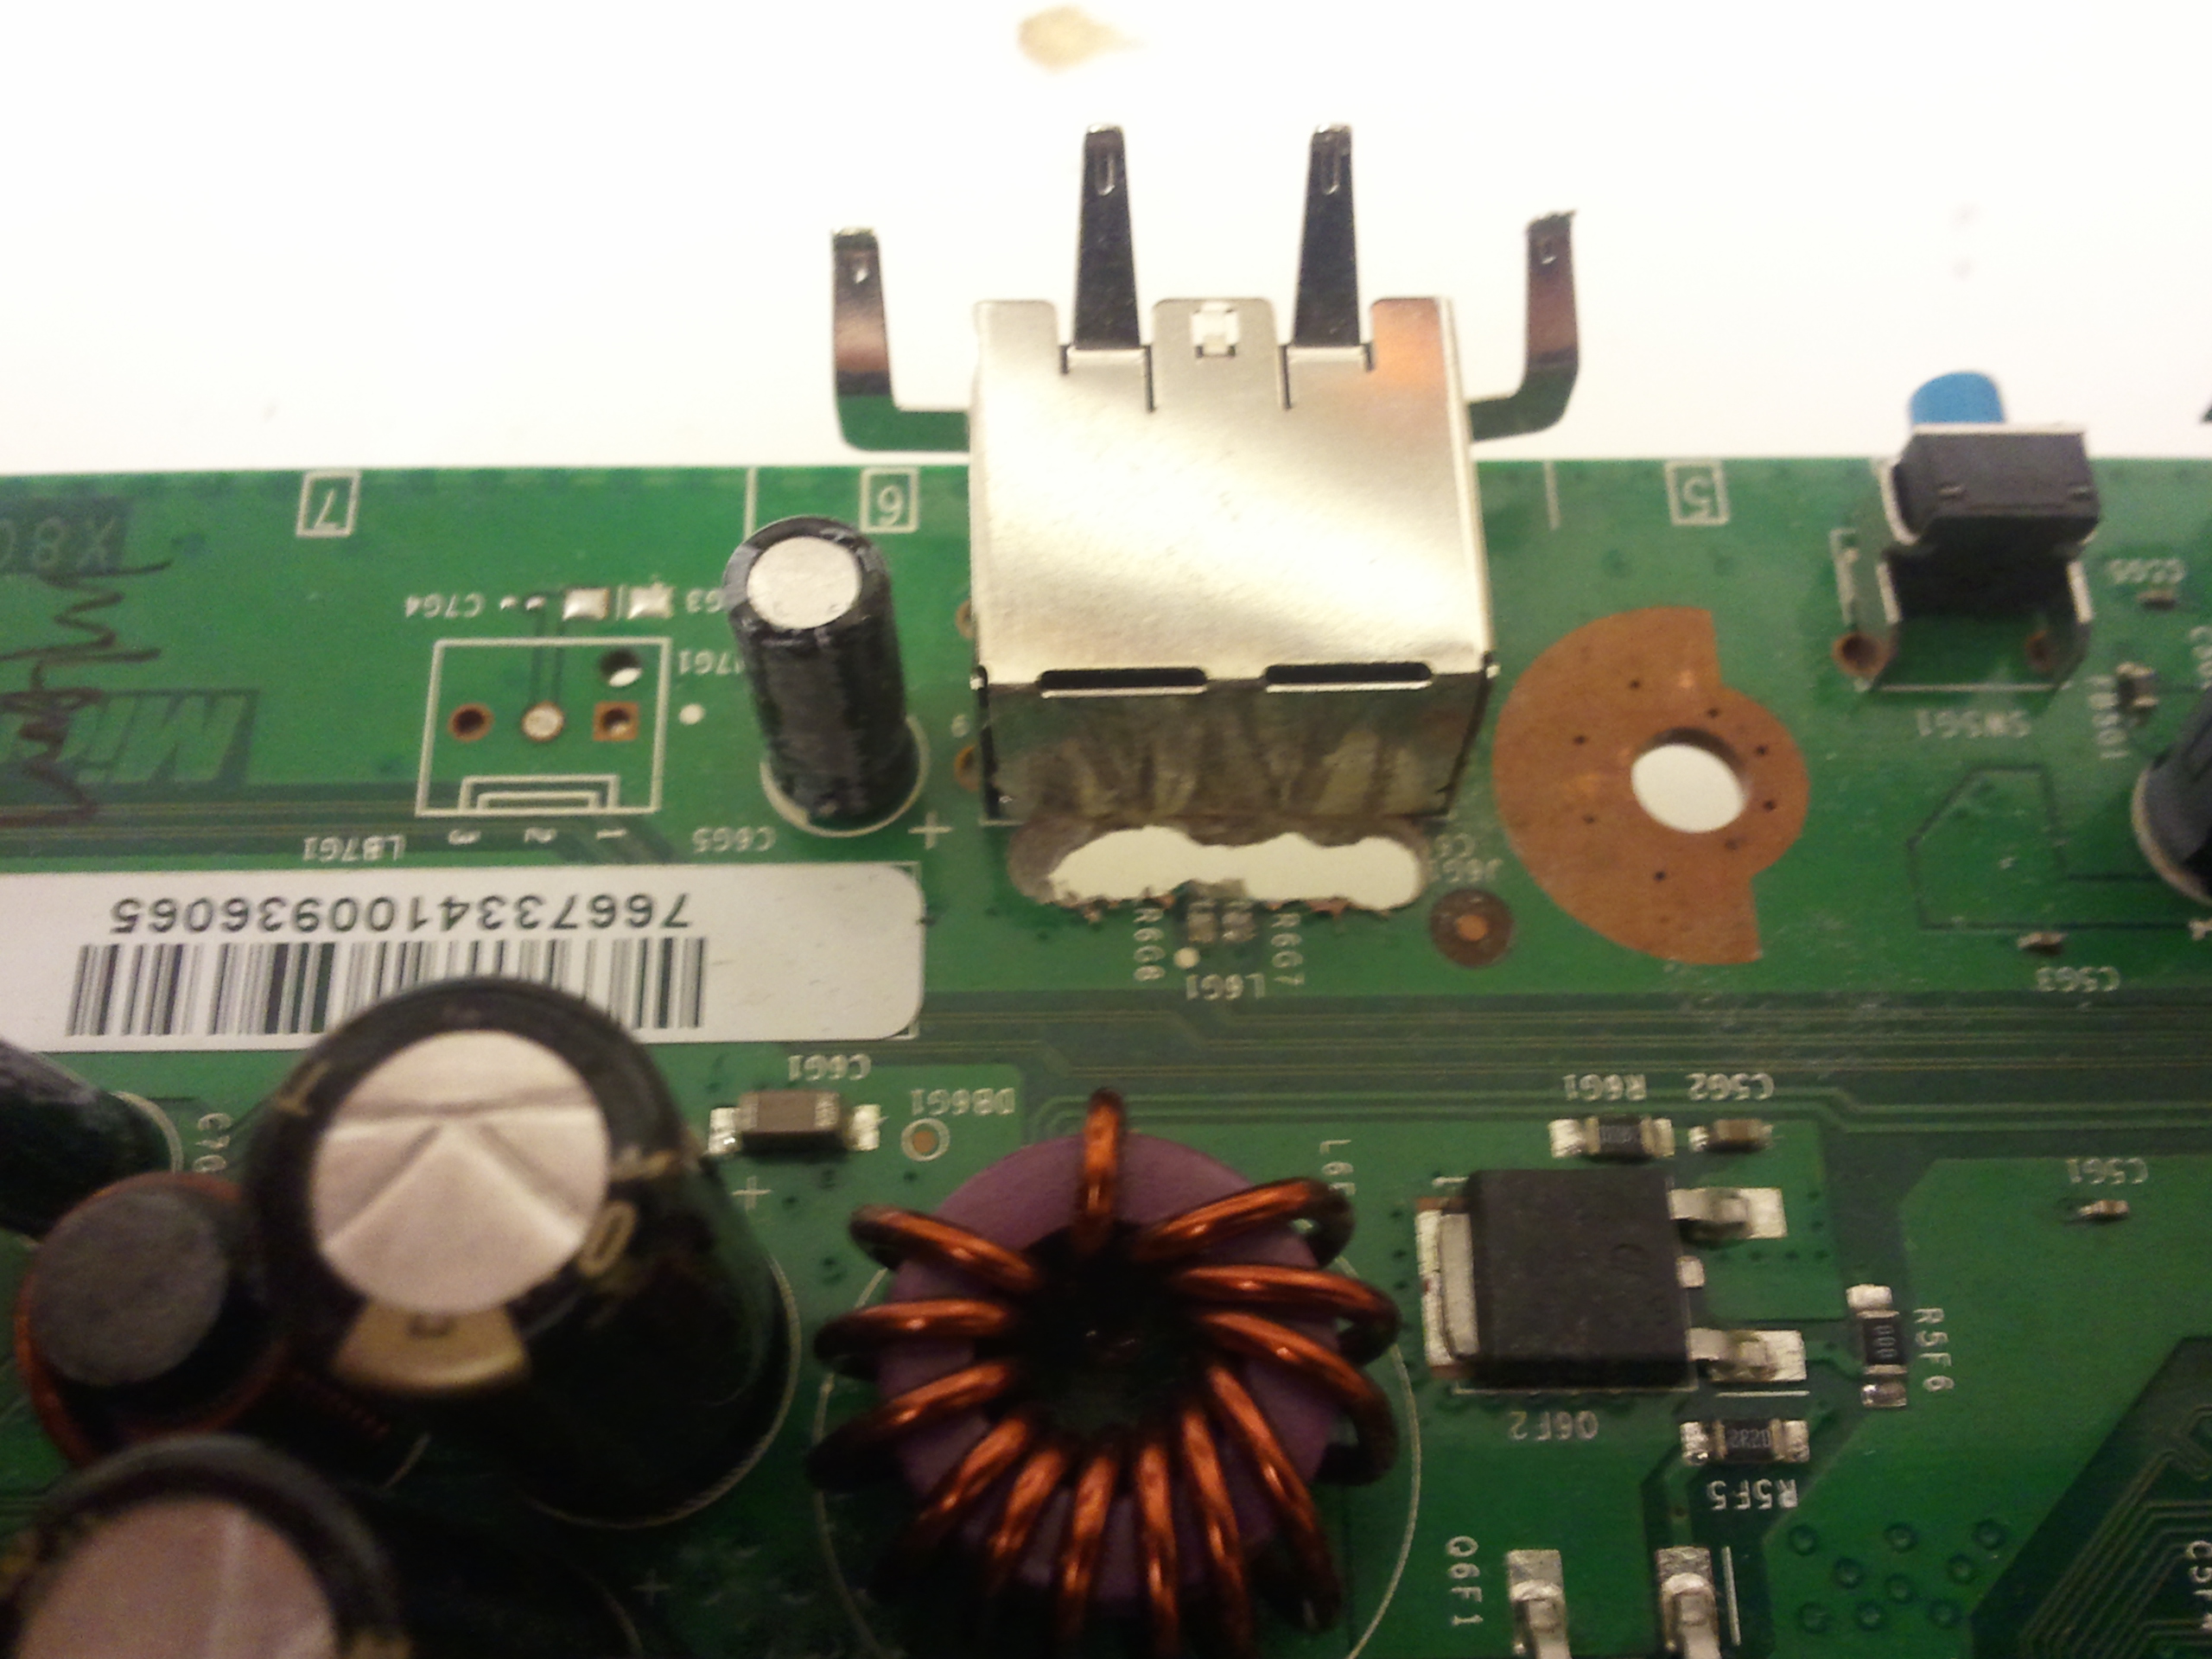
RF Daughterboard Jack
Putting it all together, I simplified the cabling by adding a USB hub to connect the two front USB ports, the RF daughterboard, and a USB-SATA adapter. A single USB extension provides connectivity to the PC. I also consolidated the power blocks such that a single brick powers the DVD drive, the microcontroller that drives the LEDs on the RF board, and also the USB hub.
This is cool man. I appreciate the work put into it and how it was plain and simple. I hate when others overload 5 to 10 minutes of useless conversation in the how-to videos these days!
thankyou soo much for your help
Hi, this is great. I’m trying to do the same with the DVD drive eject button. Do you know where I can get a wiring diagram? Mine uses an 18 pin ribbon cable.
I replaced the stock DVD-ROM drive with a spare DVD-RW drive from a dead laptop. I removed the laptop bezel and glued the XBOX 360 bezel on to the front. The laptop bezel had a button on the face. I followed it’s wires back to where they attached to the circuit board and wired the 360’s eject button to that.
Hi Heath, thanks for the article. Can you explain a little more about how you determined which pins were the right ones to solder to? I’m looking at a drive that has a 3 pin cable and Terry has an 18 pin so we’re not able to use the same pins you did. Were you able to see on the panel board which wires to follow? Did you use a multimeter or have a diagram? I’m looking at a panel board and it doesn’t seem to make sense. https://imgur.com/a/TwQgdKZ (3 ~3mb images)
Interesting that it has 3 wires. I’m guessing only two are needed. Typically eject buttons are momentary switches–meaning the wires are normally disconnected from each other, except when you’re pressing on the switch. Yes, you can use a multimeter to test this. Turn your meter to the ohm symbol (Ω). Then, as a test, touch the probes together. Your meter should read somewhere near zero–meaning there is virtually no electrical resistance between the two. Now pull the probes apart. Your meter should read some other value that is effectively infinity because there is so no current flowing. Mine reads OL which stands for Open Loop. Now set the multimeter probes on two of the 3 wires attached to the button. Does the meter read infinity or OL? No? Move the probes around until it does. Now press the button. When you’re holding down the button, does the meter read ~0Ω? It should. If it does, you’ve got the correct two wires. Wire those up to the switch on the 360’s motherboard. If you’re not sure which pins on the 360’s switch, you can do the same test on that button.