
TL;DR
I built an Ambilight clone that listens for MQTT messages over WiFi when it’s not receiving serial data. This allows it to be controlled by Home Assistant and vicariously the Google Assistant. The code lives at https://github.com/heathbar/tv-backlight.

Board Swap
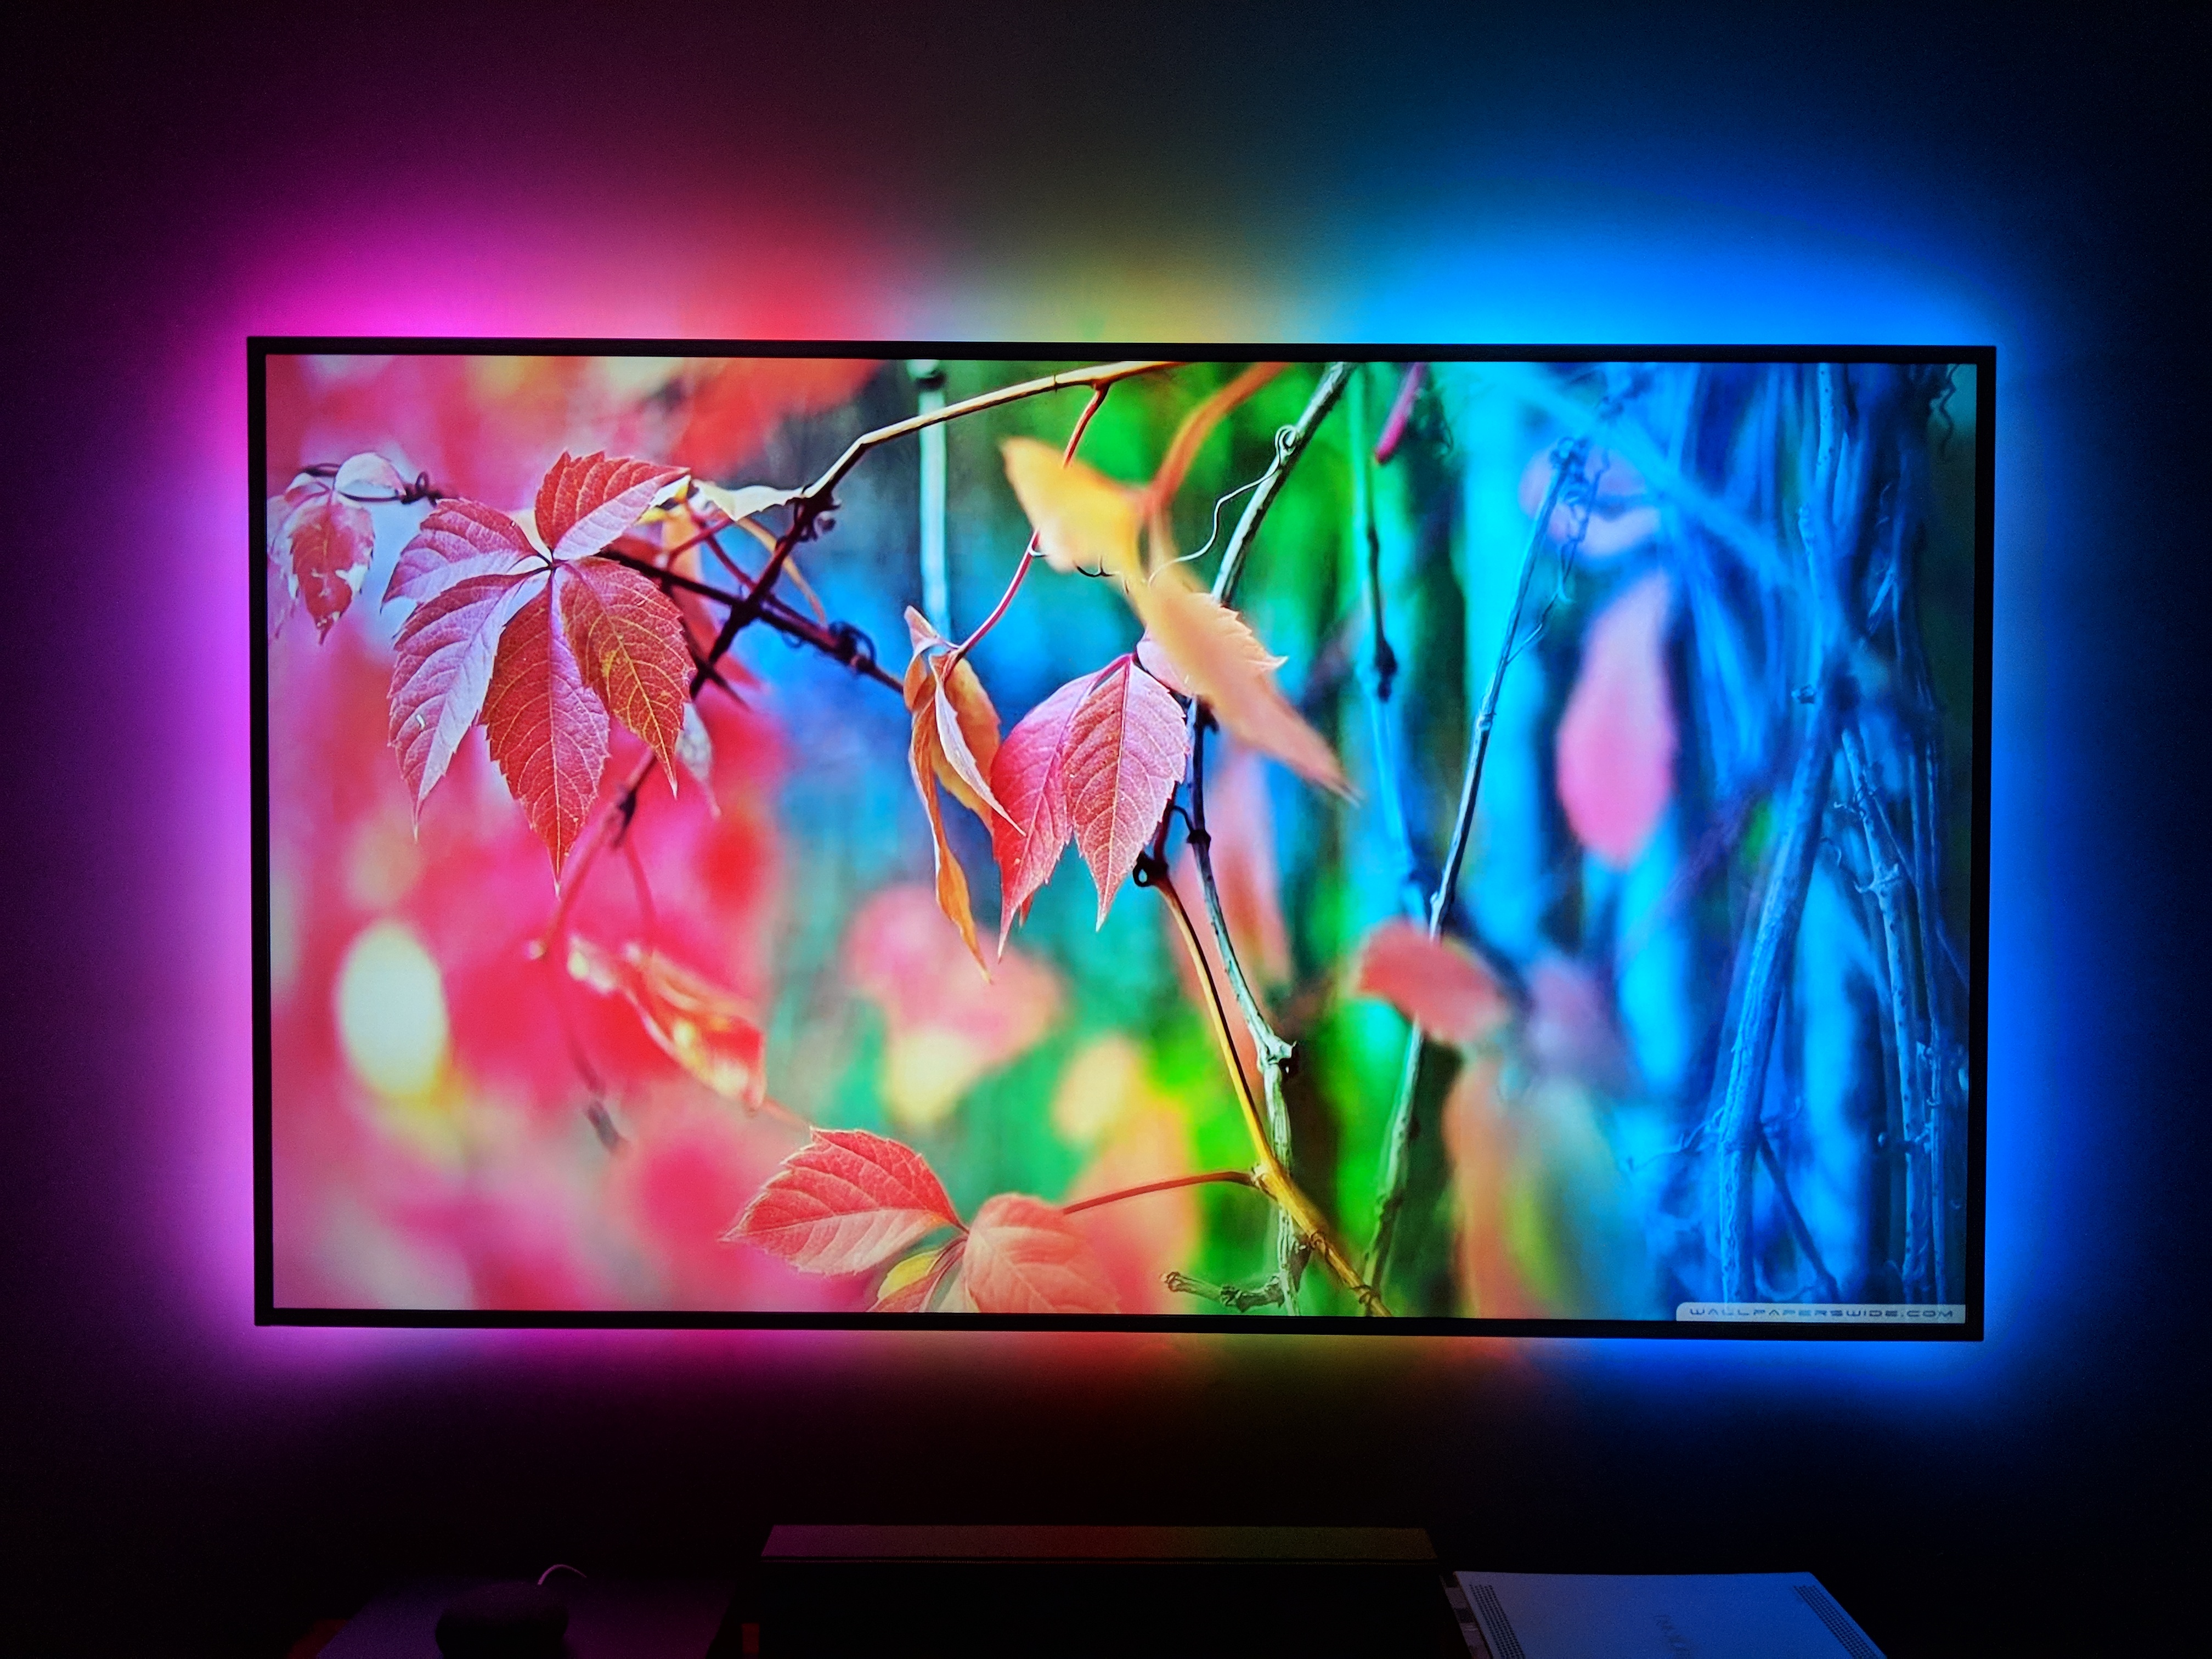
My first Ambilight clone served me quite well. I started with a system like the one described here. It worked like this: Kodi > boblight > Arduino > WS2812 LED strips.
But it was time to upgrade. The biggest change was to swap out the Arduino for a NodeMCU. These boards are built on top of the ESP8266 which provide WiFi. Unlike the barebones ESP8266, the NodeMCU boards include a USB connection. The NodeMCU boards come with a firmware that will run Lua scripts or something. I opted to discard the whole Node/Lua firmware thing and replaced it with the standard Arduino environment.
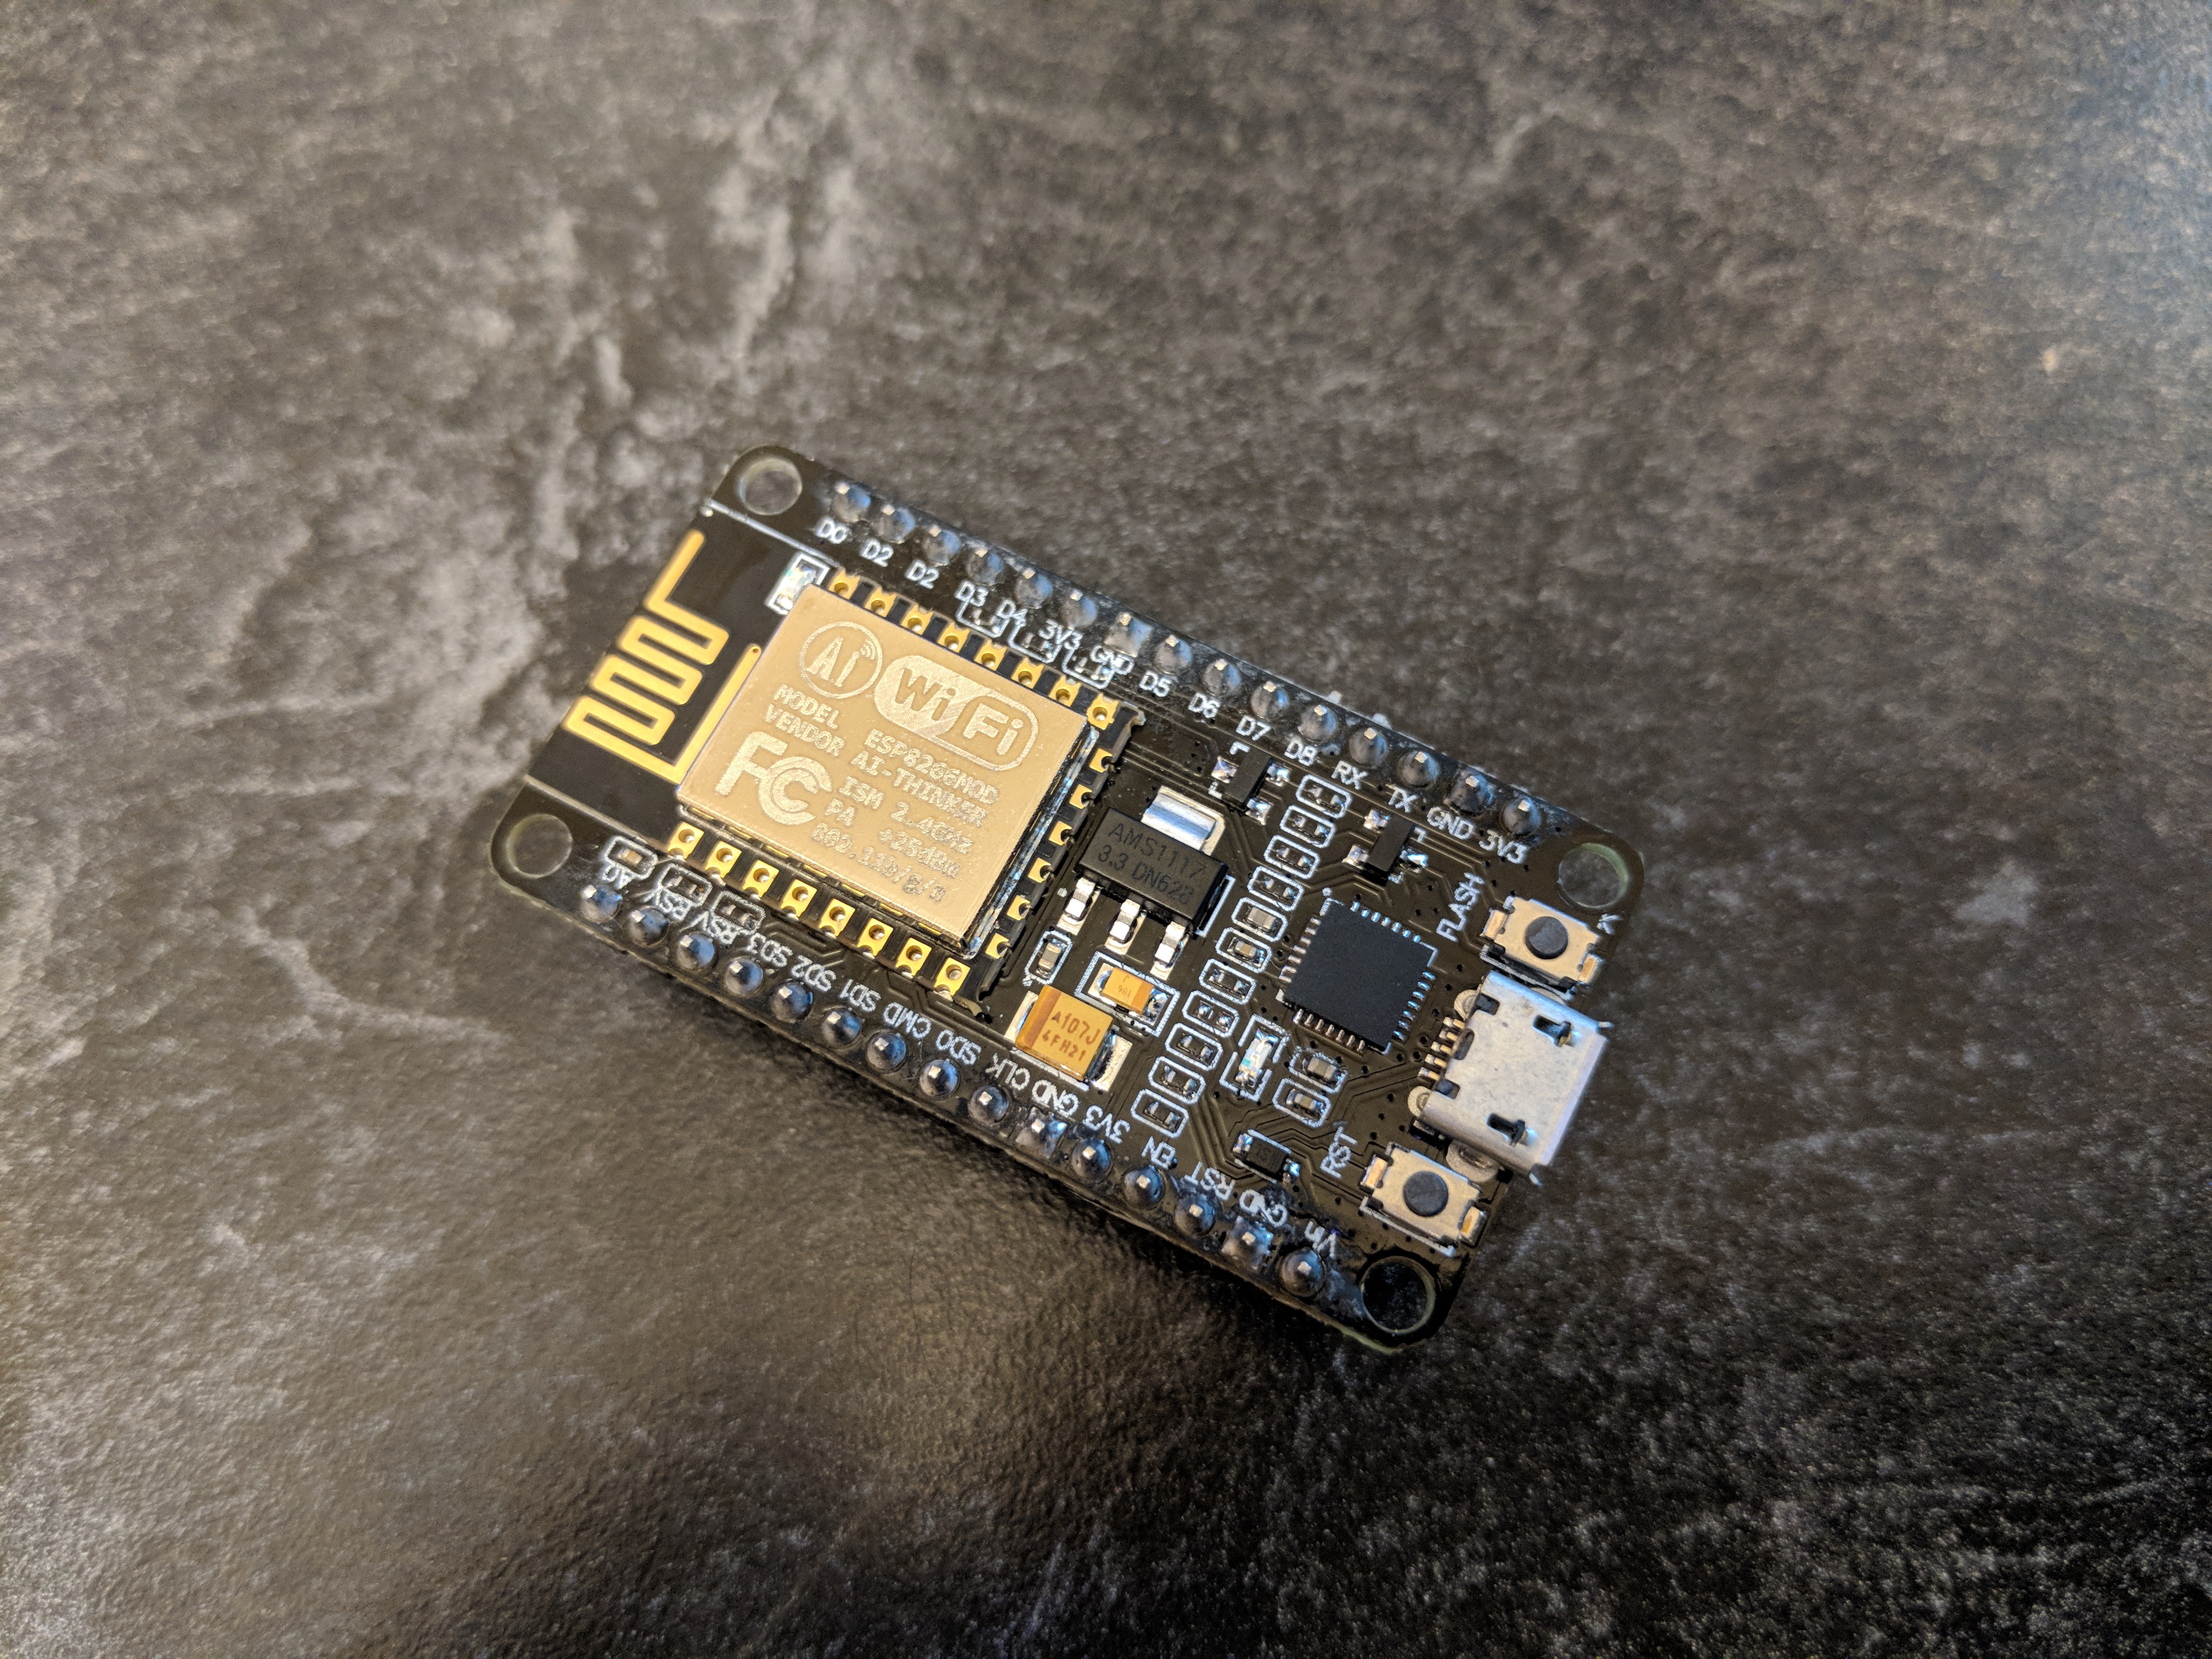
Where is pin D1?
To setup your environment for this, grab your Arduino software from https://arduino.cc. Next choose File > Preferences. In the Additional Boards Manager URLs enter:
http://arduino.esp8266.com/stable/package_esp8266com_index.json
I also had to swap out the standard NeoPixel library for NeoPixelBus. The former gave me problems when trying to use it at the same time as the serial port–although that could have been a mistake on my part.
With a few other minor changes I was back in business. The new micro controller was reading data from the serial port and displaying it on the LEDs.
Arduino, meet WiFi and MQTT
Adding WiFi support to the ESP8266 in the Arduino IDE is pretty standard business. However, where most others use HTTP for remote control, I chose to use MQTT. The MQTT protocol is a lightweight pub-sub protocol that works great with low power devices. You do need to setup an MQTT broker (aka server), but that’s pretty easy with docker.
docker run -ti -p 1883:1883 -p 9001:9001 toke/mosquittoI’ve been using the image above for some time with absolutely no issues, but it seems eclipse has recently put an official image together.
One of the benefits of MQTT is that all devices connect to the broker, so there is no need to track the IP addresses of all of your things. Everyone meets at the broker to exchange messages.
Another benefit is that the device can send you a message at any time. This was a big help when debugging since the serial port was in use.
You should have used Hyperion!!!

Actually, I did make the switch from boblight to Hyperion. Like boblight, Hyperion runs on your Kodi box and performs the same task as boblight, but also exposes a JSON API to the network. They even provide free Android and iOS apps to control the lights. If you’re reading this post, you should definitely check out Hyperion. Also, did I mention they have black border detection?
<rant>How does boblight not have black border detection yet?!!</rant>
All that said, I quickly grew tired of turning on my Kodi box, in order to turn on the lights.
Power
With the NodeMCU powered by the USB port on my Kodi box, I looked for a BIOS setting to keep the power to USB ports on, even when the computer was off. Alas, I could not find it. Plan B should have been to use a powered USB hub, but in lieu of that I built a one 1 port, powered USB adapter.
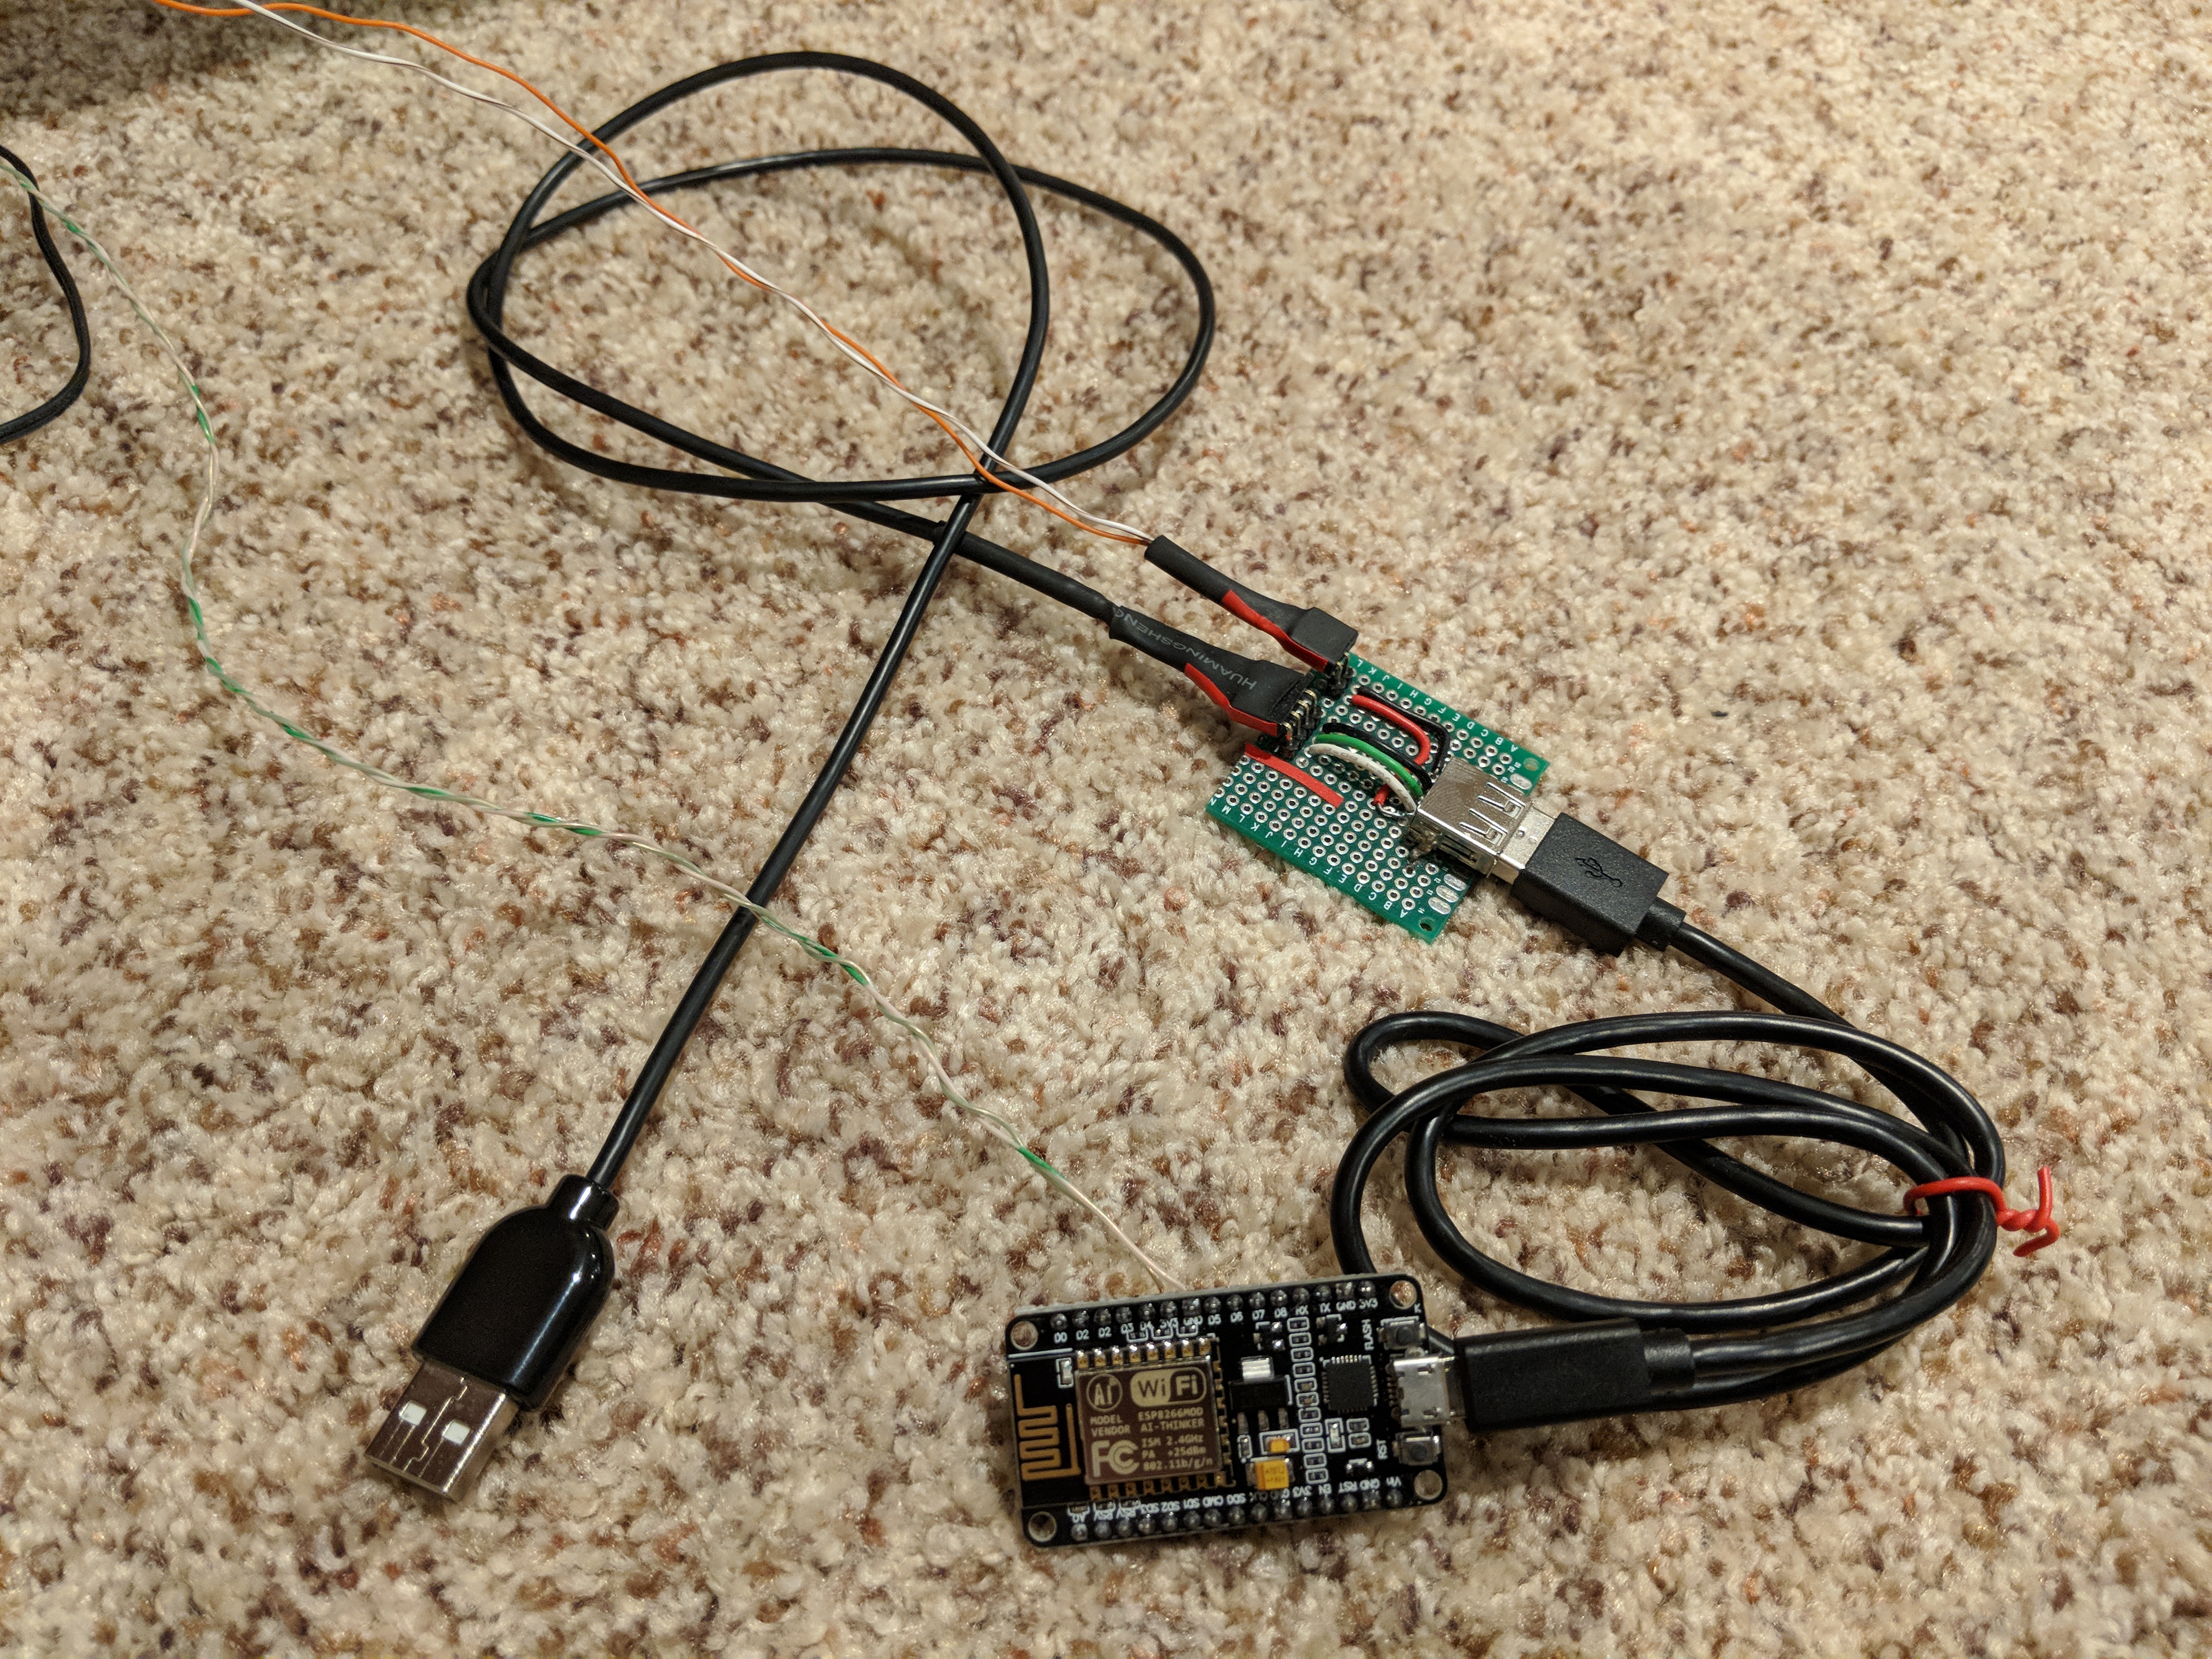
Always powered USB cable
The ground and data pins from the USB cable are passed through, but voltage comes from that secondary orange/white cable so that even when the USB port loses power, the NodeMCU stays on.
Control Interface
I use Home Assistant for the moment. It runs great on docker.
docker run -d --name="home-assistant" -v /path/to/your/config:/config -v /etc/localtime:/etc/localtime:ro --net=host homeassistant/home-assistantHome Assistant has built-in support for MQTT lights with a configuration entry like this.
- platform: mqtt
 name: Ambilight
 command_topic: 'ambilight/switch'
 rgb_command_topic: 'ambilight/rgb'
 rgb_value_template: "{{ value_json }}"
Assuming you have the Google Assistant Home Assistant component already setup, you can now control your Ambilight with your voice.
Demo Time

Ambilight Mode
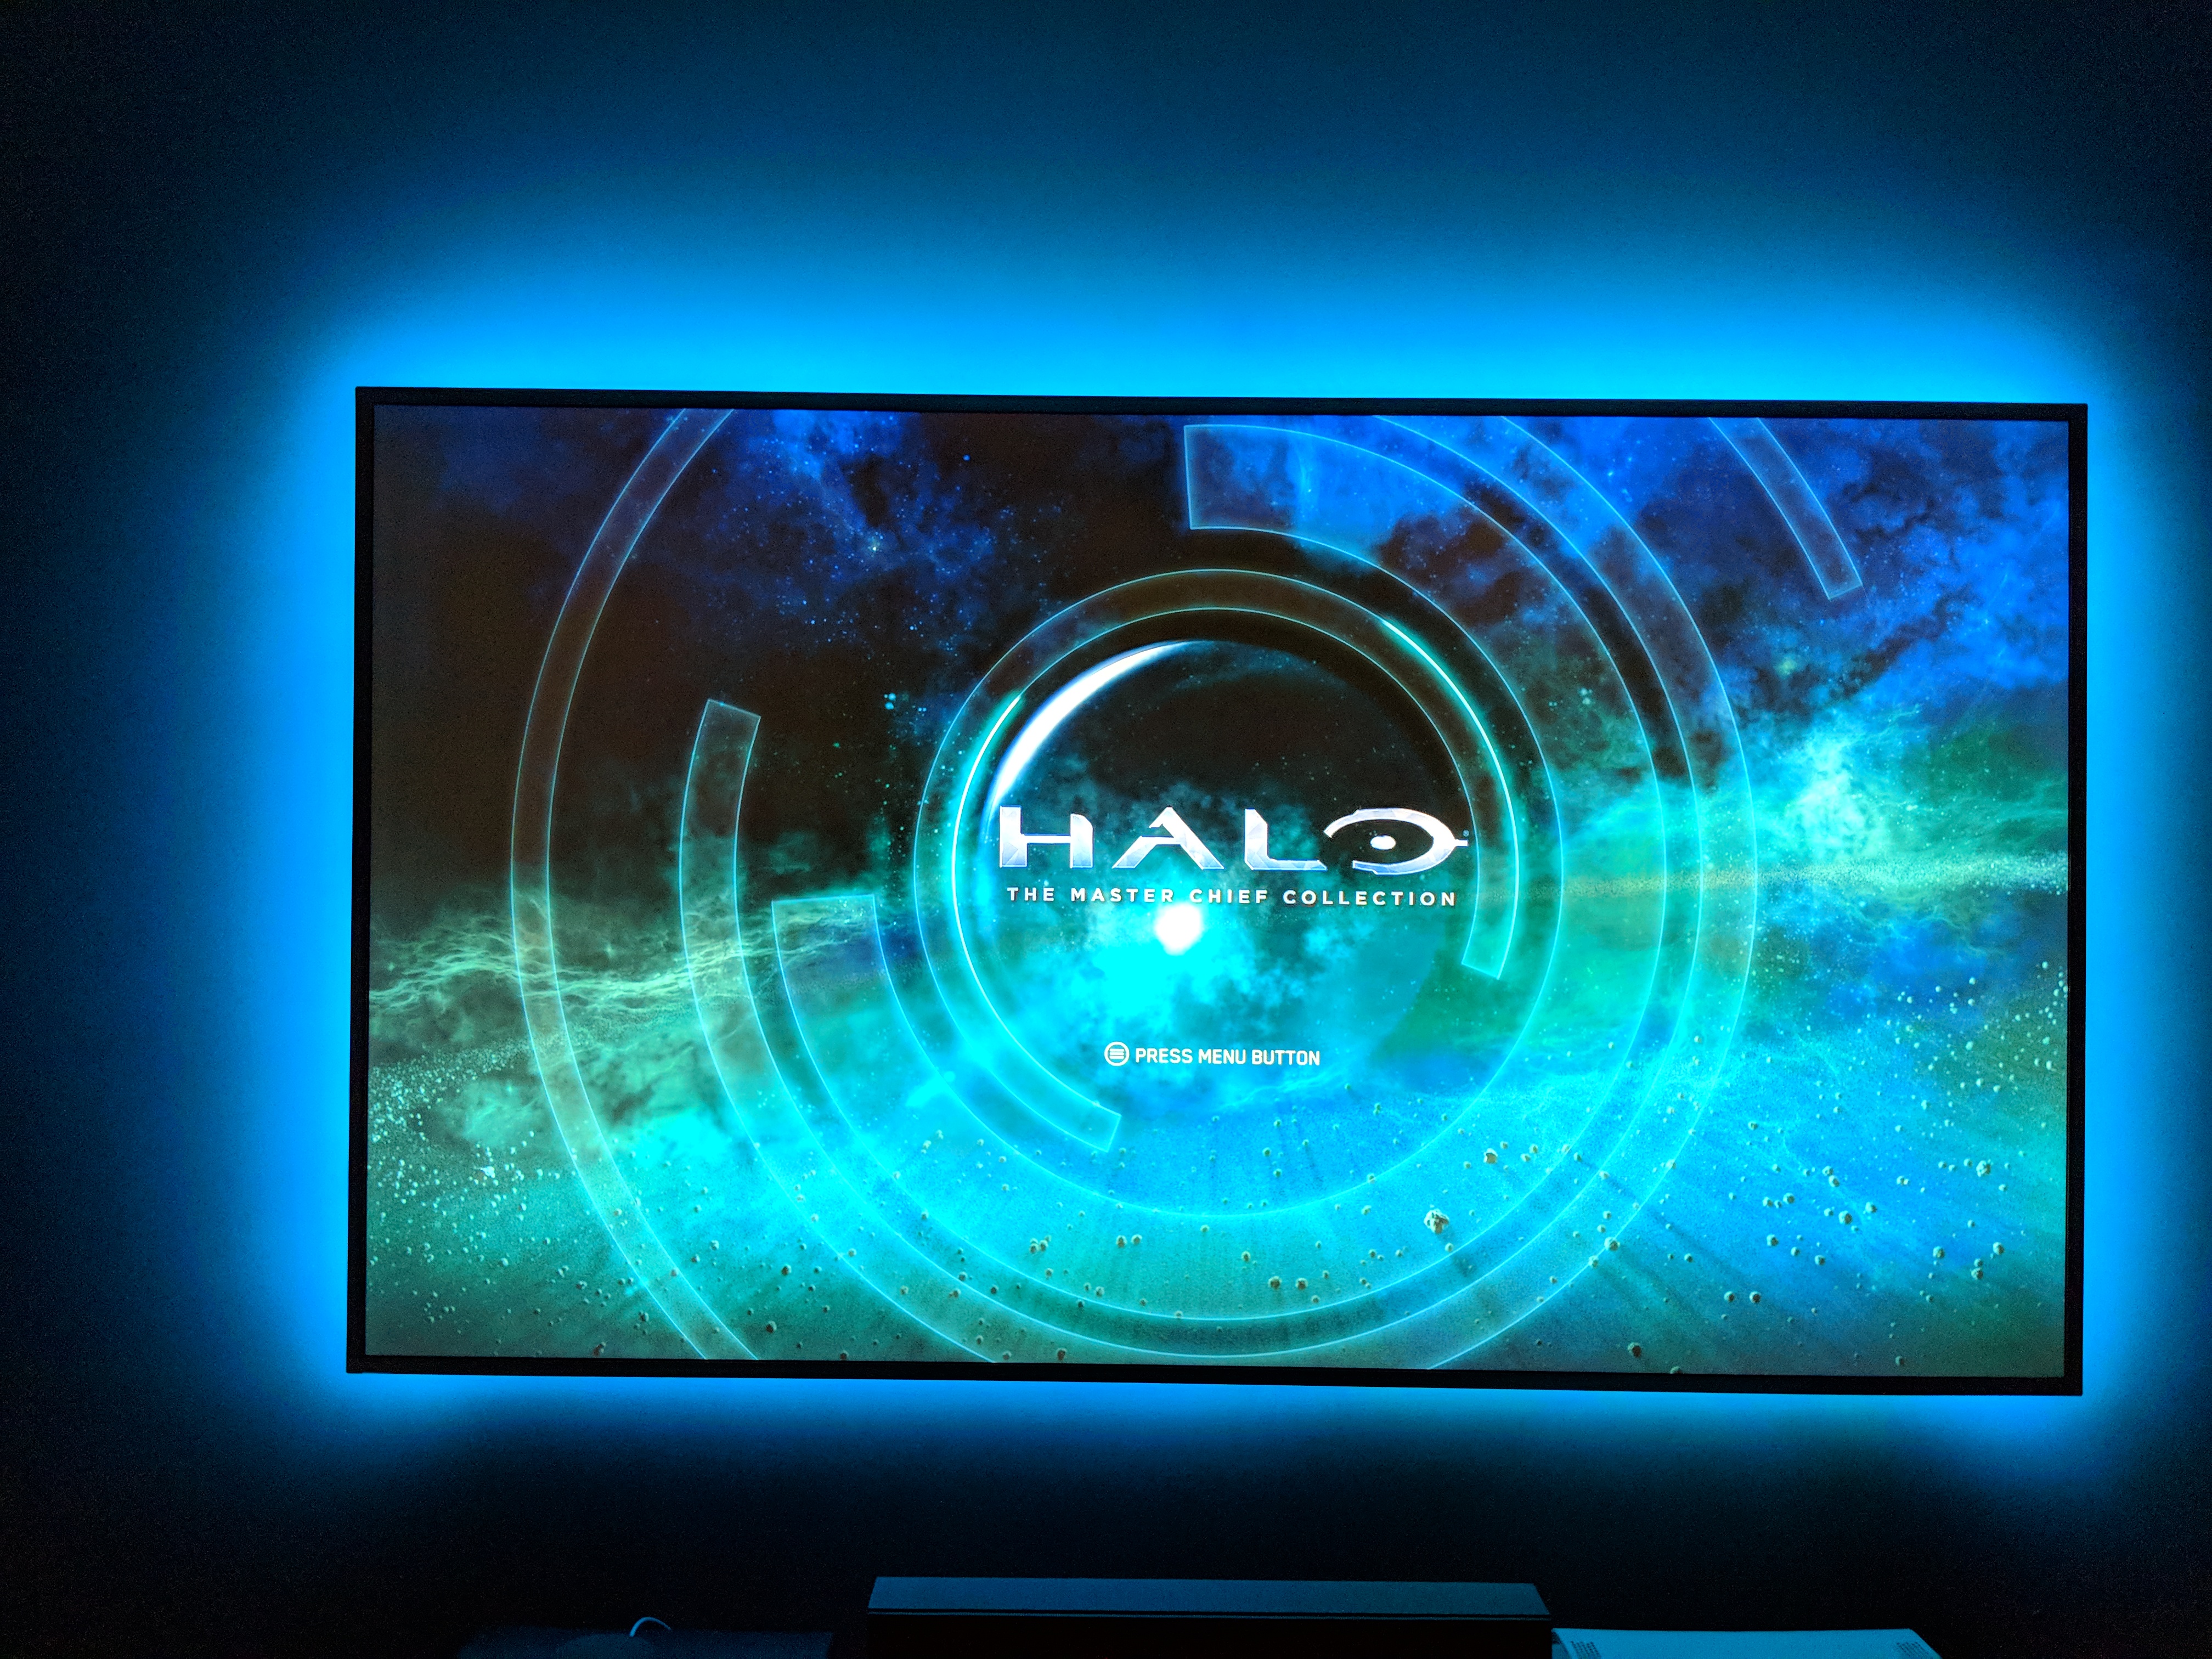
MQTT Mode
The Code
You can find the code for the NodeMCU at https://github.com/heathbar/tv-backlight.
Hi man. Great work! Can you tell about kodi settings.
You write sketch to NodeMCU and connect it to your WIFI AP. Then you started Hyperion Kodi Plugin amd next? What did you do for launch it?
I used this guide: https://hyperion-project.org/wiki/Installation-on-LibreElec
what pins should the lights connect to on the nodeMCU, if the code is standard? Ground and pins no???
Great question! The data pin going to the LEDs is connected to GPIO2 aka D4 on the nodeMCU board.
hi my friend what pins are connected to the nodeMCU from the lights is it ground and GPIO1?
Great question! The data pin going to the LEDs is connected to GPIO2 aka D4 on the nodeMCU board.
Hi,
Thanks for your post which is very interesting.
Just two questions on my side :
Did you tried the Wifimanager library ? (https://github.com/tzapu/WiFiManager) you can accomplish the same thing with the library that you are using but this one also offer a captive portal that allows you to configure the wifi over the air. (I didn’t try it by myself but i saw some exemples with it)
Regarding the sketch itself : How did you choose the baudrate ? How do you know the value that you should use ?
Thanks.
I did not try that library, but it seems like it would be a great enhancement.
The ESP seems to auto-detect the baud rate. I kept increasing it until it became unstable. I think I landed on 230400 or 460800 which significantly sped up the flashing process.
During normal operation, the baud rate is set to 230400. This took a little trial-and-error and is certainly not perfect. There are a few different modes for sending the data to the LED strip. They each vary in how they block the main (only) thread. If you block too long or your incoming baud rate is too high you will overflow the (fairly small) hardware serial buffer which is very bad. On the other hand, set it too low and you don’t get all of your data. Obviously this problem grows with the number of LEDs you are using.
I am trying this out and it seems that the NeoPixelBus library was updated in a way that the code won’t compile. If you get this error
'NeoEsp8266Uart800KbpsMethod' was not declared in this scopechange line 59 toNeoPixelBus strip(LEDCOUNT);Thanks for the update!
Hi! Thanks for article and overall idea!
Trying to implement this on my HTPC with Kodi and Hyperion.
Built using Chineese Wemos D1 mini, connected to HA without any problem – can set brightness and color.
Now trying to install Hyperion and got a problem – not sure what type to select in HyperCon app, at hardware tab. Tried AdaLight, AmbiLed and almost all others – but neither see any effect on start (i.e. INFO: Boot sequence ‘Rainbow swirl fast’ EFFECTENGINE INFO: run effect Rainbow swirl fast on channel 0) nor nothing changed when I try to set any test color at SSH tab.
Any info would be highly appreciated!
Hello I use the code from your Git, the PubSubClient by Nick O´ Leary version 2.7.0 and the NeoPixelBus 2.5.6 libaries.
Iam getting still compiling errors:
node_mcu_ambilight:59:3: error: invalid use of template-name ‘NeoPixelBus’ without an argument list
NeoPixelBus strip(LEDCOUNT);
^
/home/user/Programmierung/Arduino/node_mcu_ambilight/node_mcu_ambilight.ino: In function ‘void setup()’:
node_mcu_ambilight:63:5: error: ‘strip’ was not declared in this scope
strip.Begin();
^
/home/user/Programmierung/Arduino/node_mcu_ambilight/node_mcu_ambilight.ino: In function ‘void loop()’:
node_mcu_ambilight:122:21: error: ‘strip’ was not declared in this scope
strip.SetPixelColor(i, color);
^
node_mcu_ambilight:124:17: error: ‘strip’ was not declared in this scope
strip.Show();
^
node_mcu_ambilight:153:17: error: ‘strip’ was not declared in this scope
strip.SetPixelColor(state.serialByteIndex++, color);
^
exit status 1
invalid use of template-name ‘NeoPixelBus’ without an argument list
what can i do ?
That would be my interest as well. Any info for us?