Update
OpenHAB2 has an official Alexa Skill. You should use that instead. https://community.openhab.org/t/official-alexa-smart-home-skill-for-openhab-2/23533
Preface
The documentation on openHAB2 is somewhat lacking and scattered. But I was able to complete my journey so I thought I’d add another article to the noise.
There are a number of approaches to integrating the Echo with openHAB. I have tried some of them successfully and others less so. This tutorial focuses on what appears to be the official approach at the time of writing.
For those of you who like a road map, we will be building a custom Alexa Skill. When triggered, the skill will execute an AWS Lambda function that we will be creating. The Lambda function will call out to the myopenhab.org cloud service which will pass the appropriate action to your personal openHAB server. If any of that went over your head, you’re in the right place. Let’s do this.
- Sidenote to the tin foil hats: yes, you can bypass the myopenhab.org piece and have the lambda function call your openHAB server directly, however, there is a significant amount of extra work to make that happen and I’d recommend getting comfortable with the easy route before jumping into that.
Tag Your Items
- To expose items to Alexa, you need to tag them with Lighting, Switchable, CurrentTemperature, or TargetTemperature. The readme is a good reference.
Switch KitchenLights "Kitchen Lights" <light> (gKitchen) [ "Lighting" ]
Dimmer BedroomLights "Bedroom Lights" <light> (gBedroom) [ "Lighting" ]
Connect to myopenhab.org
I’m going to assume you have a functioning openHAB2 instance. We need to connect it to myopenhab.org.
- In your browser, navigate to PaperUI > Add-Ons > Misc, and install the openHAB Cloud Connector. Restart openHAB.
- In your browser, navigate to https://myopenhab.org. Sign up for an account. You’ll need to know your uuid and secret. These values can be found in files that live in your userdata folder. I’m using docker so that is located at /openhab/userdata/, but on other platforms you’ll likely find it at /usr/share/openhab/userdata. Inside this folder, you should find a file named uuid. Additionally, you’ll find a folder named openhabcloud with a file inside named secret. These two files contain the values you’ll need to register at myopenhab.org
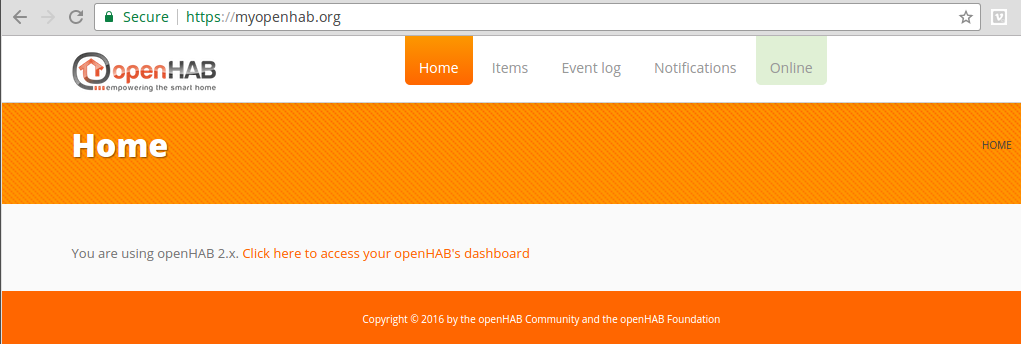
- Click the link to verify connectivity to your dashboard.
- Navigate to https://home.myopenhab.org/rest/items. You should see a list of all of your items.
Amazon Setup
The readme says you’ll need an Amazon AWS account with Alexa and Lambda access as well as an OAUTH2 Provider. Each of these pieces have dependency on the others so we will be jumping around a bit.
Amazon Developer Account
- You’ll need to sign up for a free Amazon developer account. This can be your normal Amazon user account if you’d prefer
- You’ll also need to register for a free Amazon AWS account. You will need to enter credit card info, but if you stay under the very reasonable limits, you will not be charged
- In the AWS Console you can select your region in the top right. You’ll need to set your region to either N.Virginia for US skills or EU (Ireland) for UK and German skills

Setup Security
- We need to setup an access key so the openhab script can login and setup the lambda function on our behalf
- From the AWS Console, click on your name at the top right and select My Security Credentials
- Click Continue to Security Credentials
- Expand Access Keys and click Create New Access Key
- Click Show Access Key and save the Access Key ID and Secret Access Key for later

- For the OAUTH piece, we need a security profile.
- From the Developer Console, Apps & Service then Security Profile. Finally, click Create a New Security Profile
- Name it and describe it
- Save the Client ID and Client Secret for later
- We will also need a role for the lambda function with appropriate privileges
- From the IAM Console, click Roles on the left menu.
- Click Create New Role
- Name your role and click Next Step
- Select AWS Lambda from the AWS Service Roles section
- Select the checkbox for AWSLambdaExecute and click Next Step
- Save the Role ARN for later.

Alexa Skill (Part 1)
- From the developer portal, navigate to the Alexa section
- In the Alexa Skills Kit box, click Get Started
- Click on the Add a New Skill button in the upper right
- On the skill information page choose Smart Home Skill API
- Enter the name as openhab-development. You can specify something else, but we’ll be running a script later that expects it to be called openhab-development, so proceed at your own risk. Click Next
- On the Interaction Model section click Next
- At the top of the page you should now see your application ID. It should look like amzn1.ask.skill.xxxxxxxx-xxxx-xxxx-xxxx-xxxxxxxxxxxx. Save this for later
- Before we can continue with our skill, we need to setup our Lambda function.
AWS Lambda Function
- You can certainly create the lambda function manually, but the openhab team provides a script that does the heavy lifting for you.
- If you haven’t already, clone the repo, and copy the template config files
git clone https://github.com/openhab/openhab-alexa.git
cd openhab-alexa
cp config_sample.js config.js
cp env_sample .env
- Open config.js and update the values as follows. USERNAME and PASSWORD should be replaced with your username and password for myopenhab.org.
 userpass: 'USERNAME:PASSWORD',
 host: 'home.myopenhab.org',
 port: 443,
 path: '/rest/items/',
- Next edit the .env file. You’ll need your AWS Access Key, AWS Acess Key Secret and Role ARN from previous steps
- If you are using EU (Ireland) you’ll need to set AWS_REGION to eu-west-1
- Install dependencies with the following command. npm comes with nodejs and can be downloaded from https://nodejs.org
npm install
- Create and upload the lambda function
node_modules/node-lambda/bin/node-lambda deploy
- Login to the Amazon Lambda Console and select the newly created function
- Under the Triggers tab, select Add Trigger
- Click the grey-dashed box and choose Alexa Smart Home
- Fill in the application ID from earlier. It’s the one that looks like amzn1.ask.skill.xxxxxxxx-xxxx-xxxx-xxxx-xxxxxxxxxxxx and click Submit
- Save the ARN from the top right corner. Note that this is different than the Role ARN we used earlier.
- The security conscious will want to return to the AWS Security Console and either disable or delete the access key. This key was only needed by the setup script and can safely be revoked.
Alexa Skill (Part 2)
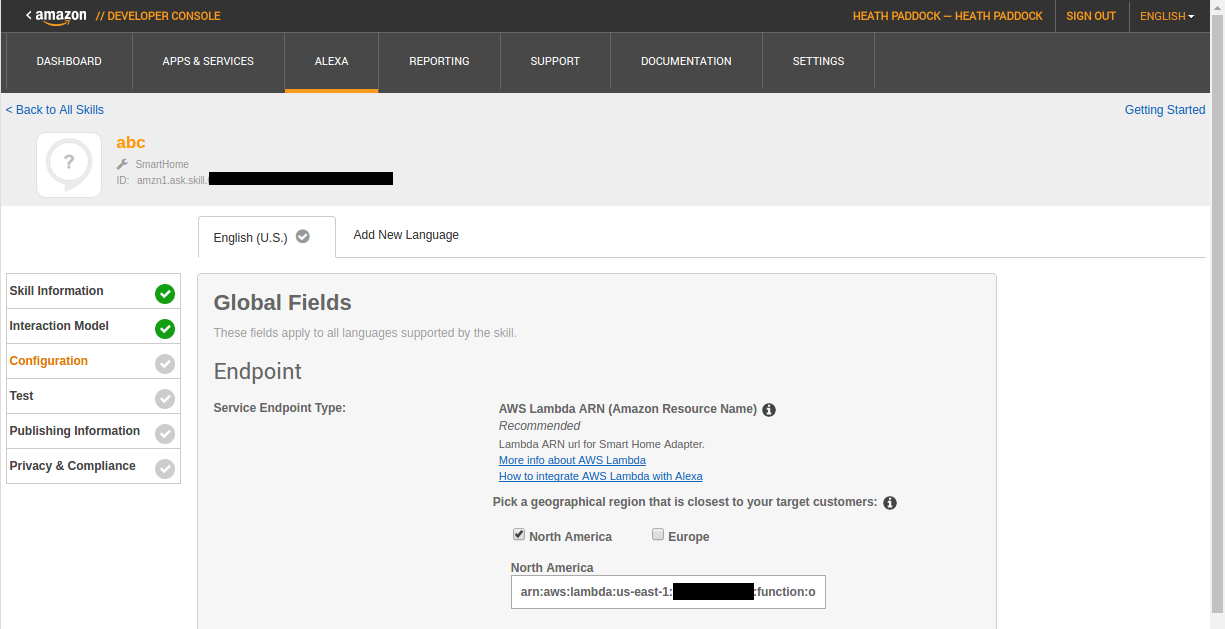
- With our dependencies met, we can now finish the skill. Open the skill list and click the edit link next to the Alexa Skill we started earlier.
- Click on the Configuration section.
- Check the appropriate box for either North America or Europe
- In the white box that appears, paste the ARN we copied from the Lambda page
- This is a great resource for the next section, but not required reading
- In the account linking section, enter https://www.amazon.com/ap/oa?redirect_uri=https://pitangui.amazon.com/api/skill/link/XXXXXXXXXXXXXX for the authorization url. Change the X’s to your redirect URI found later in the Account Linking section
- Enter the Client ID from the security profile we created earlier
- Add a scope named profile
- Set Authorization Grant Type to Auth Code Grant
- Set Access Token URI to https://api.amazon.com/auth/o2/token
- Specify the Client Secret from the security profile we created earlier
- Finally, save the redirect URL for later

- Click Next
- On the Test page, make sure the toggle is selected to show the skill in the Alexa app and click Next
- There are a couple more sections that are not required to be completed since we will not be publishing the skill
Security Profile (Revisited)
- From the Developer Console, Apps & Service then Login with Amazon.
- Next to your security profile, select the gear icon then select Web Settings.
- Click Edit and enter the Redirect URL from the last section in the Allowed Return URLs box. It should be of the format: https://pitangui.amazon.com/api/skill/link/XXXXXXXXXXXXXX
- Save
Enable the Skill
- Open the Alexa app on your phone.
- Navigate to the Skills section.
- In the top right, click the Your Skills button
- Scroll to the bottom to find your skill.
- Tap on it, Enable, Login
- The App will prompt you to discover devices.
- If all goes well, Alexa will find the tagged openHAB items and you will be living in the future!
I’m still unclear about the details for tagging. Could you step through that?
The tag goes in the square brackets at the end: For example: [ “Lighting” ]. There are only a handful of predefined tags that you can use. This page has a table with the available tags: http://docs.openhab.org/addons/io/homekit/readme.html
Hi!
I follow the steps, but this step gives me an error: node_modules/node-lambda/bin/node-lambda deploy
pi@raspberrypi:~/openhab-alexa $ node_modules/node-lambda/bin/node-lambda deploy
Generating zip file
(node:32127) DeprecationWarning: os.tmpDir() is deprecated. Use os.tmpdir() instead.
/home/pi/openhab-alexa/node_modules/node-lambda/lib/main.js:117
throw err;
^
Error: Command failed: zip -roq /tmp/openhab-1497034647794.zip * -x ‘.git’ -x ‘*/.*’ -x ‘*/*.log’ -x ‘event.json’
/bin/sh: 1: zip: not found
at ChildProcess.exithandler (child_process.js:205:12)
at emitTwo (events.js:106:13)
at ChildProcess.emit (events.js:194:7)
at maybeClose (internal/child_process.js:899:16)
at Socket. (internal/child_process.js:342:11)
at emitOne (events.js:96:13)
at Socket.emit (events.js:191:7)
at Pipe._handle.close [as _onclose] (net.js:509:12)
Thanks!
You simply don’t have zip installed.
Hi,
first of all, thx for the detailled description – I am curious where it will lead me to 🙂
But I have a question about these bulletpoints:
-Login to the Amazon Lambda Console and select the newly created function
-Under the Triggers tab, select Add Trigger
-…
When I (re)login to Lambda, I can’t find that Triggers tab… I am always redirected to some kind of “AWS Lambda Overview Page” and also don’t find anything within the ARN role… can you please give me a hint?
Thanks a lot,
Martin
This is a really great tutorial. You might mention that this is obsolete now that the skill is officially available. I went through all these steps and it didn’t work, only to realize that I could simply enable the skill in the skill store.
Done
You might want to add that this is also the way to create a skill for your own myopenhab instance.
Hi All
I install the app and can see my Skill created openhab-developement. When I hit Enable, I get an error “Linking unsuccessful” – the authorisation server returned with an error parameter.
Any suggestions?
The instructions dont make much sense.
At the bottom you change the redirect URI for the security profile Login with Amazon, but there is no creation of a profile under Login with Amazon.
At the top, where you create a profile you dont specify it needs to be done under Login With Amazon. You specify to do it under ‘Security Profiles’
Can you confirm what is correct here?
I try but din’t work.
Hi,
following your steps I was able to setup my own openhab-cloud with basic authentication.
Now I wanted to use OAUTH2. So I put userpass: row in config.js again into a comment and uploaded the zip file again.
I am not able to get this working. I restarted my openhab-cloud host several times and also tried to load the skill on the phone again seveal times. When I search for new devices I see that the /rest/items file is requested by the app but as the authorization does not work the access is rejected.
Any idea what I need to try or how I can debug this ?
As mentioned at the top of this post, it’s been a few years since this post was made and there are now better ways to connect Alexa with openHAB.